Tuesday, December 30, 2008

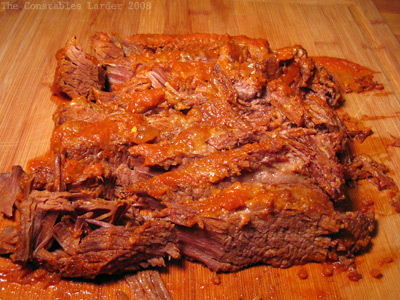
Beef Brisket braised in White Wine

brisket braised in white wine

::: Constables Larder has moved to http://constableslarder.com :::

I'll just come out and say up front that this is the best straight-up brisket braise I have ever done, and I've been tinkering with brisket recipes all year. It is easy to prep, and just requires a little patience with the slow cooking. So with no further ado:

Spice Rub
2 tsp salt
1 tsp spanish/smoked paprika (pimenton)
1 1/2 tsp oregano
3 bay leaves
1/2 tsp coriander seeds
1/2 tsp cumin seed
1/4 new mexico red chile powder

Main Ingredients
2 to 3 lb beef brisket (grass-fed if you can get it)
2 large carrots, roughly chopped
1 1/2 large onions, roughly chopped
6 garlic cloves, roughly chopped
1 28 oz can of whole, peeled tomatoes
1/2 bottle dry white wine
3 or 4 tbsp of olive oil


In a spice grinder, grind up the components for the spice rub. Remove the brisket from the fridge, wash it and pat it dry. If your cut has a large amount of excess fat, you can trim it but leave some for flavor and moisture. Apply the spice rub and let the brisket come to room temperature for about 30 minutes.

Preheat oven to 275F.

In a large dutch oven, heat up the olive oil on medium-high heat until very hot (a drop of water will sizzle and pop). Brown the brisket on one side for 2 minutes, then brown the other side for the same. Remove the brisket to the side, and lower the heat to medium-low.

Add the onions and garlic into the pot and cook, stirring occasionally, until the onions start to turn translucent. Add in the carrots and cook for another couple of minutes, then pour in the white wine. Scrape the bottom of the pot with your wooden or plastic spatula to deglaze any remnants from the browning of the beef. Add in the tin of whole, peeled tomatoes and the accompanying juice. Do not break up the tomatoes.

Nestle the brisket into the liquid and vegetables, cover the dutch oven and place in the oven. Braise for 5 or 6 hours at 275F, gently turning the brisket every 1.5 to 2 hours.

Before serving, remove the dutch oven from the oven and carefully spoon out as much of the excess fat/oil from the top of the liquid around the brisket. Remove the brisket to a warm plate or a cutting board, and blend up the liquid and vegetables into a gravy using a blender, food processor, or an immersion blender (which is what I used, thanks to a lovely Christmas gift from my sister). Return the brisket to the dutch oven and cover to keep warm if you need a few more minutes to prep your dinner.

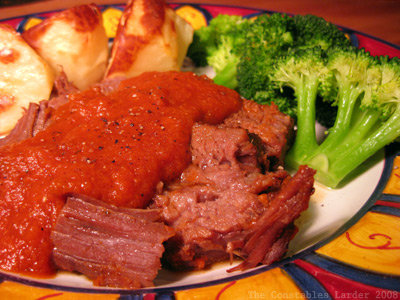
Serve by slicing against the grain (expect it to fall apart as you slice) and either present on a serving tray with the gravy on the side, or plate with several spoonfuls of the gravy on top and maybe a little fresh pepper.

brisket braised in white wine, plated
I served this with a favorite treatment for potatoes, which is to peel, halve or quarter, and steam about halfway done. Then you bake them with a sprinkling of olive oil and coarse sea salt on top until fluffy and tender inside and browned on the outside. So good.


Previous Recipes: If you like beef brisket, you might try Brisket braised in Slab Bacon, Sweet Peppers and Squash

Sunday, December 28, 2008

Chicken Pot Pie, the Basics

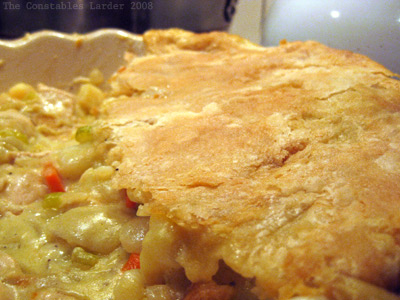
chicken pot pie

::: Constables Larder has moved to http://constableslarder.com :::

On Saturday, we crawled through traffic back up the Eastern seaboard and returned from visiting family in Washington DC. There are few things more soul destroying than hours stuck traffic. Naturally, I needed to make a chicken pot pie to recuperate. Chicken pot pie is scientifically proven to pack high levels of emotionally recuperative bosons and gluons by the ounce.

It is a little known fact that they plan to test FermiLab's Large Hadron Collider by accelerating a chicken pot pie to the speed of light and thus duplicating comfort food conditions at the origins of the universe. It will either cause the end of the world, or it won't; there appears to be some debate, which is comforting in and of itself.

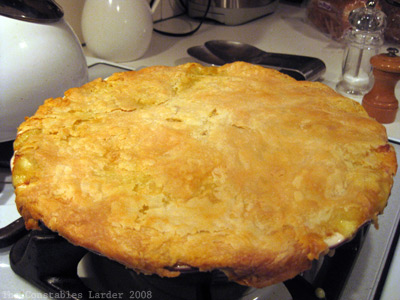
Below is a recipe for a simple pot pie, and a decent framework for elaborating upon with other ingredients (leeks, peas, turnips, parsnips) and herbs (parsley, rosemary, oregano, tarragon, etc). Note: I hope you'll excuse the hack-job of the pastry edging in the above picture... I was moving fast in a race against the clock for Munchkin's dinner time.

Chicken Pot Pie

1.5 lb chicken breast, cut into 1/2 inch cubes
2 medium red potatoes, cut into 1/4 to 1/2 inch cubes
1 white onion, diced
3 medium/large garlic cloves, peeled, woody end removed, and minced
3 medium carrots, sliced into 1/4 inch rounds or smaller
3 celery stalks, cut into 1/4 inch slices
1 tsp ground savory (alternative: 1 tbsp parsley and/or 1/2 tsp dry thyme)
1/2 cup dry white wine
salt and pepper
olive oil
5 tbsp unsalted butter
1/2 cup flour
2 cups milk
2 cups chicken stock (or water)

Pastry
1 1/4 cup flour
1/4 tsp salt + a couple more pinches
7.5 tbsp butter
approx 5 tbsp ice cold water

Egg wash: 1 tbsp water, 1 egg yolk

Making the Pastry
For this pot pie, I decided to work off of Alice Waters' savory pastry proportions from The Art of Simple Food. I was only making the pastry for the top, so reduced the amounts from the 2 cups of flour in her book, keeping with her proportions (hence the extra pinches of salt to get to around 1/3 tsp).

Cut the butter into 1/4 inch cubes and place in the freezer for 15 minutes. Fill a glass with ice water and place next to your food processor. Combine the flour and salt in a food processor and pulse a few times to mix. Add the butter to the processor and add 4 tablespoons of the ice water, pulsing the mixture between each tablespoon.

Remove the mixture to a clean surface and gently work it together. If it is not holding together at all, add another tbsp of the ice water. When the crumbly mixture is just holding together (you do not want it sticky or wet, and it is ok to have a little still crumbly), form into a rough ball, wrap in plastic wrap, flatten, and place in the fridge for an hour.


Preparing the Filling

Preheat the oven to 375F.

Bring some lightly salted water to boil in a medium sauce pot and boil the potato until just tender, no more than 10 minutes given the small cut. Drain or remove to a bowl with a slotted spoon, and keep the sauce pot around for the white sauce.

Heat a splash of olive oil in a large saute pan on medium heat and brown the chicken, then remove to the bowl with the potato. Lower the heat to medium-low and saute the onions and garlic for a couple of minutes, then add the carrots. Cook for 5 minutes, then add the celery, ground savory (or other herbs), white wine, and a couple pinches of salt and pepper. Cook for another few minutes then turn off the heat.

At this point, turn to the sauce pot: melt 5 tbsp of butter on medium-low heat, then wisk in the 1/2 cup of flour and cook for a minute stirring regularly. Theoretically, it is best to have your milk and stock (or water) already at a near boil, but if you haven't had time or the energy to dirty another pot, it isn't the end of the world just to add them directly now. Cook at a gentle simmer for another 5 minutes. (If you like your pie really rich, you can add 1/4 cup of cream too)

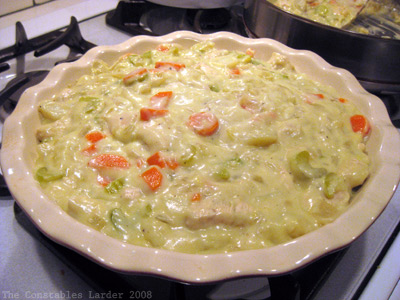
Stir the white sauce into the saute pan with the vegetables and taste for salt and pepper. Then stir in the chicken and potato. Spoon the mixure into your pie dish until it is near the edge.

chicken pot pie fill
Photo note: the mixture looks a little green-ish because of the ground savory.

Finishing the Pie
Remove the wrapped pastry from the fridge, and on a lightly floured surface, with a floured rolling pin, roll out your pastry into a thin layer an inch or so bigger than you need for the pie dish. Lightly flour the top, to prevent it from sticking, and gently fold the pastry in half or in quarters to safely lift it in one piece to the top of the pie dish. Crimp the pastry around the edge of the pie dish, and then cut off any excess pastry hanging over the edge with a sharp paring knife. Make some vent holes in the top with the knife (or a fork).

If you have the time, it is nice to mix an egg yolk with a tbsp of cold water and brush this egg wash on top of the pastry. (I did not, this time around)

Place the pie in the oven (which was pre-heated to 375F) for 45 minutes, then let cool for 10 or 15 minutes before serving.

chicken pot pie

Sunday, December 21, 2008

Food Blog Photography Lessons, Pt 1

banner for post

::: Constables Larder has moved to http://constableslarder.com :::

This post has tips for the beginner food photographer; in particular, for food bloggers working with a point-and-shoot digital camera. If you are like me, you might suffer from the following challenges when it comes to food blog photography:
  • your effort is hindered by hungry and impatient people requiring the food and your presence at the dinner table asap (i.e. you must work very fast)
  • you do not have the space and/or budget justification for fancy camera and lighting equipment
  • you do not have the space and/or budget justification for endless props such as serving dishes, image backgrounds, serving utensils, etc
  • you usually cook in the evenings after work, so always have poor light situations
For the last several months, I've been meaning to write up some of my tips from experiments in creating photos that do not completely suck, while dealing with the above constraints. If you are a winner of DMBLGIT, this post is probably not for you. I aspire to get to that level of proficiency.

I should note that this post dwells mostly on technical details I've been grappling with, rather than aesthetics (I tend towards the "natural" end of the food photography spectrum). If someone else finds my lessons useful, then I am happy.


On Point-and-Shoot Digital Cameras
I do not own a digital SLR, much as I drool over them; nor do I have time to set up a tripod. I have barely enough time to grab a couple lights from the shelf, put food on a plate, attempt to make it reasonably attractive, fire off a number of shots at various angles and focus points, hope for the best, and make for the dinner table.

OK, not exactly professional, but I make no bones about being in the early-amateur camp. My enjoyment of the challenge and my desire for improvement offset frustration over results.

Before food blogging, I'd never bothered to open the manual on a point-and-shoot digital camera. However, these little cameras today (see below for mine) are packed with features that you really need to know. My favorite features:
  • the setting for "digital macro" shooting: chances are your camera has a setting for close-up or still life photography that will improve your close-up shots immensely. Note: camera makers often use a little flower or tulip icon for this.
  • setting the default focus point to center: when it comes to food photography, you don't want your camera trying to figure out where to focus. Set the camera to focus on the central point, so that you get to choose where to focus. Once you've got the camera focused appropriately for your shot, you can then shift the way the camera is angled to frame your image as desired (on most models, this would be done while holding the "shutter" button down halfway). Just remember that tilting the camera left, right, up or down will be ok, but if you change the distance of the camera to the object, say by taking a step back, then you need to refocus.
  • manual white balance: a lot of models have the ability to manually set the white balance, which in many cases will solve color correction problems (the glorious "orange cast" effect). This is not a panacea, but it will sometimes save you in low light situations.
  • the ability to turn off the flash
cameraOne feature I do not use is the manual ISO setting. Bumping up the ISO for low light situations just creates a more grainy image, in my experience. For the record, my camera is a point-and-shoot digital camera, a Canon SD1100. There are a number of other interesting features that I am starting to experiment with, but the above are the standouts so far.


On Lighting
A few things I believe:
  • Food photography is so much better in natural light (exceptions made for for cool artsy styles)
  • Never use the flash unless you have a high-quality setup like Deb at Smitten Kitchen
  • Mirrors are very useful, if you have time to break them out
Those of us who cannot shoot in daylight must develop work arounds. Some folks buy fancy lighting equipment and tripods. If you are handy like Jai, you can make your own lighting setup. My problem is that I have no space to keep lighting equipment, nor time to pull it out and set it up, so my current solution is cheap clamp lights that you can get from a hardware store for under $10. Below is an example of my very-temporary setup at the end of the island in our kitchen:
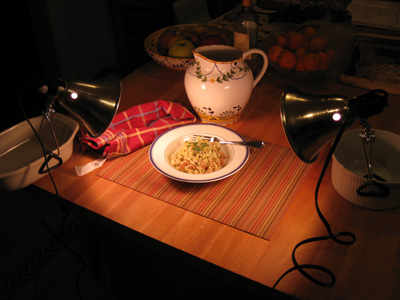
lighting example
As you can see, it is a bit haphazard but I can set it up and take it down very fast. I just grab the lights (and their extension cord) and a few objects that can hold them in place without tipping over. The necessary distance between the lights and the food will vary, and you may need to angle the lights more indirectly if the type of food is too reflective. Reflections are the downside to this type of lighting -- ideally you would defuse the light somehow rather than have a bare bulb, but I haven't McGuyered up a cover yet that that would stay in place and not freak out a fire inspector.

Other Notes:
  • Mirrors and white boards can be great -- they reflect light and can even out the lighting in your shot, or remove unwanted shadows. I don't always have time to grab or use them, however.
  • I've been playing with a trick where I will hold one of the clamp lights in my left hand, while holding the camera in my right. I'll press the camera shutter button halfway down to set focus and the light meter, but then I'll move the light in my left hand around until I get an effect I like. This is how I captured that apple shot with the dramatic lighting at the very top of the post.
  • I'll also note that I have been using Chromalux light bulbs, which I discovered eons ago in my art days, and which cast a warmer, more natural light. You can often find them at art supply shops. However, I'm not really convinced that these are worth the money here, since I still need to solve color balance issues either via manual white balance or Photoshop (see below).

On Photoshop
If you don't have great camera and lighting equipment, I don't see how you can get the right color balance for your shots without either: 1. effective use of your camera's manual white balance feature, or 2. by having good image editing software (I use Photoshop). In truth, I usually try both. I take at least one shot using automatic white balance (which is then edited in Photoshop), and one shot using manual white balance. I never quite know which method will produce a better image - it really varies.

Below is a crude example of what I am talking about. Shot #1 was taken with the camera on automatic -- it shows that typical orange cast that needs to be fixed in Photoshop, the results of which are #3. Shot #2 shows the image without any Photoshop editing, but with manual white balance set on the camera.
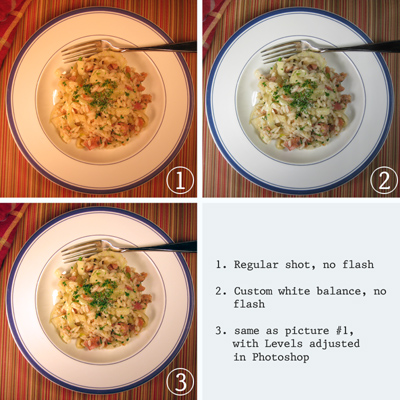
levels vs white balance examples

Photoshop - Levels
While I might use a number of different tools in Photoshop for a particular image (Hue/Saturation, Color Balance, Brightness/Contrast, etc), the feature I use most often is the manual setting of Levels.

When you open your picture in Photoshop, you can go to Image > Adjustments > Levels and you will see something like the below pop-up. To keep things simple, focus on the three little arrows under the histogram (one black, one grey, one white). These arrows help you set the brightness, shadows and midpoint of the image. You will also note that you can change the "Channel" you are working on (circled in red).

levels channel picker

The RGB channel will make changes to the composite image should you just want to work on shadows and brightness. However, if you have color correction to do, you'll want to look at each of the Red, Green, and Blue channels.

You'll want to experiment, but to keep things simple, I will note that you can fix a lot of color problems by going to each Level channel and dragging the black and white arrows under the histogram to the point where the histogram starts (i.e. where you see a rise off of the baseline - see the red arrow in image below). Sometimes it takes a little fiddling to get a picture you are happy with, but this tool will take you a long way forward.
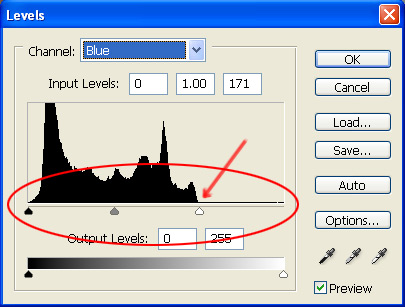
levels channel set

Photoshop - Saturation
I am not a fan of people who use Photoshop to blast out their color saturation (i.e. carrots with an orange that could light up the Tokyo skyline). I will sometimes use the Hue/Saturation tool to tone down an image, or a particular color, where color correction has increased saturation too much for my taste. However, sometimes computer monitors are to blame here, and it is just a problem that comes with Web. We can't control what computers our readers are using. Different monitors will show color very differently. Mac and Windows machines also have really different default settings.

Photoshop - Unsharp Mask
The Unsharp Mask filter can be useful when working with point-and-shoot JPGs. Some images which theoretically should be in focus, don't always look that way once they are shrunk down. This filter can help, and don't let the name fool you (it neither unsharpens nor is related to Photoshop's masking features).

When Photoshop sharpens an image, it increases the contrast between neighboring pixels, or pixels on an "edge" in the image, and Unsharp Mask gives you a fair amount of control over this. There are three settings:
  • Amount: the strength of the sharpen effect (on a 400x300 pixel image, I usually use 25 to 35)
  • Radius: determines the thickness of the sharpened edge (on a 400x300 pixel image, I usually use 1 or 0.5)
  • Threshold: determines what Photoshop recognizes as an edge -- the higher the number, the fewer points of contrast will be considered edges (on a 400x300 pixel image, I usually use 3 or 4; I find zero to be harsh in most cases)
I don't always use this filter, and I will pass on a word of warning: be really conservative using Unsharp Mask on images where you have light reflections off of liquid or oil. It doesn't look good.

Photoshop can be an overwhelming application, but it is truly amazing. I've only scratched the surface of it, and learned most of what I know through the Photoshop CS2 Bible, Professional Edition, and highly recommend that book although it costs a small fortune.


Lots of Pictures
Even though I am moving fast, I usually take several different type of shots, since I don't know what I will like until I get to look at them. I'll try an angle shot, a vertical looking-down shot, a super close-up, etc. That's the great thing about digital cameras -- you can take lots of pictures.

Final Notes and Links
I know I didn't spend any time on aesthetics, but really I view that as a hugely subjective realm. Everyone has their own taste and needs to feel confident in developing their own style. Have confidence in yourself, even if you hate your own results for a while as you improve. Look at lots of pictures on blogs, flickr, cookbooks and magazines, and think about what you like, don't like, and why.

Here are some links to other food blog photo tutorials that you might check out, in no particular order:
I hope some of this was useful to a few of you out there in the food blogosphere. If you have tips from your own experiments and lessons, I'd love to hear them!

Wednesday, December 17, 2008

Bayless' Tomatillo Pork Braise

::: Constables Larder has moved to http://constableslarder.com :::

Before I talk about this recipe, I wanted to highlight the Menu for Change fundraiser going on for the World Food Program. You can find out information at Steamy Kitchen or Chez Pim. It's an inspiring effort. Another good cause I would point you too is Kiva, the micro-lending site. If you are into the food blogging community, you might join the 101 Cookbooks team over there.

The first time I heard of Rick Bayless was his appearance on Top Chef - Chicago. I was flipping through a Food & Wine book and ran across his Tomatillo Pork Braise recipe, which was originally in his Mexico One Plate at a Time cookbook. Always being one to try a braise, I kept reasonably true to his recipe, split the work for this over two work nights, and loved how it came out. It is deliciously tart and has a real kick.

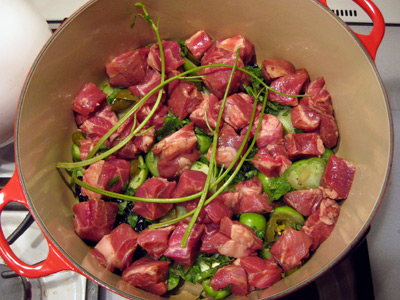
pork tomatillo braise

Tomatillo Pork Braise, adapted from Rick Bayless

2 lb boneless pork shoulder, cut into 1 inch pieces
1 tbsp worcestershire sauce
1 to 1 1/2 lb tomatillos, husked and cut into half-inch slices
4 medium garlic cloves, peeled and halved
1/3 cup pickled jalapeno slices, most seeds removed
1 dried ancho chile, stem and seeds removed, and halved
1 1/2 tsp salt
1/2 cup chopped cilantro
1 cup dried Cargamanto Cranberry beans
water

Preheat oven to 300F.

Place the cut pork into a bowl and add the worcestershire sauce, stirring it around to coat the pork evenly. In a dutch oven, layer the tomatillos, then scatter the garlic, half of the cilantro, jalapenos and ancho chile (ie dried poblano pepper) on top. Sprinkle with 1 1/2 tsp salt. Then scatter the pork evenly over the top. Place in the oven for 3 hours. (Note: my picture shows a few cilantro stalks thrown on top for good measure)

During this time, you can cook the beans if you are doing this dish all on the same day (see note below). Bring the beans to a boil for 2 minutes, then drain. Refill pot with water an inch or so over the top of the beans and cook until tender. Drain and set aside.

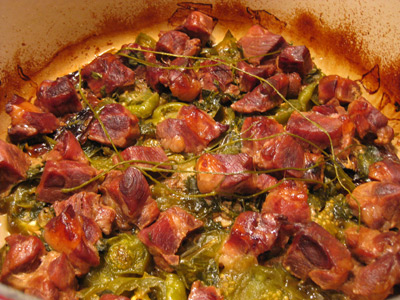
pork tomatillo braise

When braise is done, remove the pork to a bowl with tongs.

Remove any excess oil from the braise vegetable mixture, and then puree in a food processor or blender. Place back in the dutch oven and cook over low heat. Add enough water to bring the sauce to the consistency of a creamy soup (I probably added 1/4 cup or possibly more of water to mine).

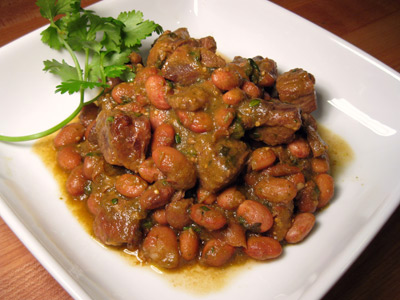
Stir in the beans, the rest of the cilantro and the pork and cook on low heat until everything is warm, then serve.

pork tomatillo

Notes:
1. Bayless recommends adding a little sugar if the sauce is too tart for your taste. I found it perfect without the sugar, but then I'm a big salsa verde fan.

2. If you don't want to use beans, Bayless recommends placing potatoes, turnips or even carrots in below the meat at the start of the braising stage, and removing before the puree step. If you like beans, I think many variations will work here. Bayless recommends Great Northern. I used a Cranberry bean variant and think Pinto beans would probably work nicely too.

3. Bayless also suggests tossing in some fresh spinach and creme fraiche when pureeing the sauce, which does sound pretty good (I didn't have any on hand)

4. because I was cooking this on work nights, and didn't want to eat at midnight, I split it into two nights. The prep is pretty quick, so the first night I just had to get the braise into the oven and leave it for 3-hours. I placed the meat and sauce mixture in the fridge overnight, in separate containers. The second night, I cooked the beans, pureed and finished the sauce, added the meat and heated everything up together on the lowest heat setting (pot covered).

Sunday, December 14, 2008

Lentil Soup with Pesto

lentil soup with pesto

::: Constables Larder has moved to http://constableslarder.com :::

Ever since I married an Australian, one of those rare moments of perspicacity, I have developed a fondness for all things antipodean. For many months, I've been wanting to join in the "Hay Hay it's Donna Day" event, needing no other motivation than the fact that it is from down under. This month's event focused on pesto, and is hosted by two blogs I have long enjoyed: 80 Breakfasts and Bron Marshall.

For HHDD, I decided to make an arugula pesto, and put it to work similar to an aioli in a soup. In this case, I made a rich lentil soup with ham and a healthy dose of tarragon that complemented the pesto marvelously.


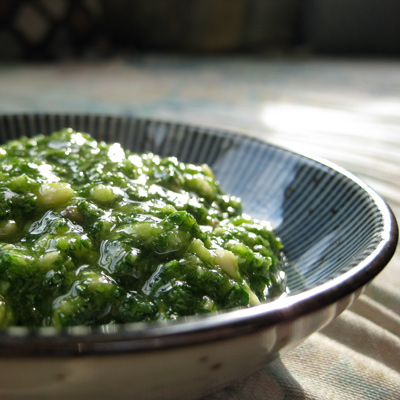
Arugula Pesto

arugula pesto

1 cup arugula, finely chopped (1 cup after being chopped)
3 small/medium garlic cloves, finely chopped
1 1/2 tbsp lightly toasted pine nuts, finely chopped
1/2 cup finely grated pecorino romano cheese
1/2 cup extra virgin olive oil
a small pinch of salt

The Donna Hay recipe that 80 Breakfasts put forth used a rough chop method. I decided to loosely follow in those footsteps and leave the food processor in the cupboard, but I still ended up chopping everything pretty finely.

To lightly toast the pine nuts, heat up a non-stick saute pan and then toast the pine nuts for a minute or so, shaking the pan to move and roll the nuts around.

I should note that when I normally make pesto to eat with pasta or with bread, I go much lighter on the garlic, but this pesto was purpose-made for the following soup. I had the strong garlic aioli of Provence in mind as a rough inspiration.


Lentil and Ham Soup

1/2 lb dried lentils, washed
3 carrots, 2 roughly chopped, 1 whole
3 celery stalks, 2 finely chopped, 1 whole
5 small/medium garlic cloves, minced
2 medium/large onions (1 white, 1 spanish)
1 cup of smoked ham, chopped in a 1/3 inch dice
4 slices of bacon, cut into 1/3 inch pieces
1/2 cup dry white wine
3 tbsp tomato paste
1 tsp salt + more to taste
3 tbsp parsley, finely chopped
1 tbsp tarragon, finely chopped
1/8 tsp ground pepper (to taste)
water
olive oil

In a large soup pot, heat up a tbsp or so of olive oil and saute, over medium heat, the garlic and onions until onions are translucent. Remove onions to a bowl and place the bacon into the pot. Cook the bacon until it is 2 or 3 minutes away from being crispy, then add in the ham and cook, stirring occasionally, for another couple of minutes. Remove the bacon and ham to the bowl with the onions and drain any excess bacon fat.

Heat up the pot again with medium-high heat and deglaze the bottom of the pan with the white wine. Add back in the onions, bacon and ham, and stir in the lentils, chopped carrots, chopped celery, tomato paste, salt, parsley, and tarragon. Pour in enough water to about 2 inches above the tops of the vegetables. Add in the whole carrot and celery stalk (for added flavor), and the bay leaf.

Bring to a boil and then immediately lower down to a gentle simmer. Skim any foam or excess oil off of the surface as it cooks, and simmer for 3 hours (if you can wait that long). Taste for salt and pepper, and if the soup is looking too thick for your liking, add some boiling water as needed. Before serving, discard the whole carrot, whole celery stalk and bay leaves.

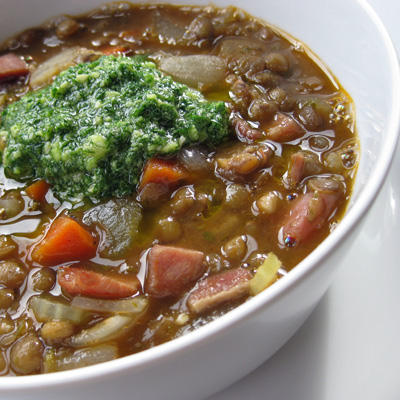
Serve in a bowl with a large dollup of pesto in the middle. As with most soups, this only gets better the next day.

Additional notes: I do not usually make lentil soup with tarragon, but found that it added an interesting element (and I like the herb - if you are less sure, halve the amount). In particular, I found that the tarragon complemented the pesto extraordinarily well, and the two together elevated a hearty, peasant-like lentil soup to another level of sophistication.

If you choose not to go with the tarragon and pesto flavoring as shown here, serve the soup with a nice handful of roughly chopped flat leaf parsley.

lentil soup w pesto

Friday, December 12, 2008

Holiday Greetings, Egg Nog, and Oyster Stew

2008 holiday card

What a magnificant time of year it is. Winter has set in like the unfurling of a crystal flower. Snow is still exciting, not troublesome, and we have not yet reached the tired, bitter bite of February and March. The house smells like a frasier fir, and the world is lit up all around by fairy lights. My musical tastes switch almost entirely to classical music this time of year.

I happen to be the worst person in the world at sending Christmas Cards, as my acquaintances will readily admit, but here is my little homemade holiday card to you -- friends old and new. Happy holidays to you all!

For those who are eggnog fans, I might recommend Grandma House's eggnog recipe (link). Grandma House, you might ask? Well, my father was one of seven children, who all had children, and every year our massive clan would descend upon her house in the middle of the Maryland countryside. The house was originally built in 1747 (I remember my cousins discovering civil war era swords in one of the ancient barns), so had a memorable quality. Somehow, when we were all very little, she became known as "grandma house". She is long gone now, but I do miss her. Quite a lady.

I warn you, even though I have reduced the alcohol level from what *she* used to do, the recipe still can have a real kick. I might advise adding the alcohol in batches, then tasting, rather than all at once.

The other dish that I always think of this time of year, which also came from Grandma House, is oyster stew (link), which is really a soup. While we vary our Christmas dinners from year to year, this soup is always a mainstay by popular demand.

All the best to you, and may you have a safe and happy holiday season.

Tuesday, December 9, 2008

Veal Braised in Milk; a lesson learned

::: Constables Larder has moved to http://constableslarder.com :::

IN WHICH Pooh visits the butcher and does a Silly thing
Pooh, being a bear of very Little brain, was happily flipping through cookbook pictures, given that he was nearly always hungry and that words were best left to Eminences like Rabbit. Pooh did not exactly know what an Eminence was, but had a vague feeling that it had something to do with arugula and very expensive sea salt. As Pooh read, he hummed a little song:

Cooking for bears is like
Poaching with pears, and baking
a cookie or two.
You think we like honey but
the funniest honey...

At this point Pooh was wondering how honey could be funny, and if it really was appropriate to have two uses of the word honey right next to each other, but honey being what it was, Pooh decided that more was always better. Then he stopped, because on the next page was something called veal braised in milk.

Pooh had never eaten veal braised in milk before, but he knew that he must like it, not in a Tigger-looking-for-breakfast kind of way, but with a I-must-make-this-recipe-right-now feeling. So by and by, Pooh set off for the local butcher. Pooh knew in the back of his head that veal was expensive, but he figured that since it was a braise, it should be a cheaper cut, as most well-behaved braises are. After waiting in line, Pooh came to the proprietor.

"How can I help you," said the butcher.
"A boneless leg of veal, about 2 or 3 pounds please," asked Pooh.
"What part of the leg?" asked the butcher (who tended towards the irascible).

At this point, Pooh was very Confused. The recipe hadn't called for a part, just a leg, although obviously Pooh wasn't going to be cooking an entire leg, but still it felt Highly Irregular. The butcher rattled off a list of parts, then asked what it was for, and then rattled off some other parts. Pooh thought to himself, "WWOD?" (What Would Owl Do), and then nodded his head, trying to look sage but not doing a very good job. He also snuck little glances at the line of customers behind him, waiting for him to Hurry Up and make up his mind.

"Yes," said Pooh, figuring that yes would be faster than no, and definitely faster than maybe.

The butcher disappeared and after a few minutes his Helper brought out a wrapped piece of veal and went over to the cash register.

"That will be $72.68," said the Helper.
"_" said Poo, taken aback.
"!" said Poo, trying again and attempting to recollect why he had gone to the butcher's in the first place.

Now Poo, being a bear and a stuffed bear at that, cannot really look stricken, but if Pooh could look stricken, then that is how he would have looked.

"How much is that per pound?" asked Pooh, cautiously.
"Twenty-two dollars," stated the Helper, who was starting to look at Pooh a little Suspiciously.

Pooh, feeling a little miserable now, not to mention a little foolish, bought the veal and took it home, and attempted to avoid telling Mrs. Pooh just how much he had spent on a part of a leg of veal. He could not tell if he was angry at the butcher for not warning him, angry at the veal for being so expensive, or just angry at himself for being such a Silly bear.

However, when Pooh cooked up the veal braised in milk for some visiting Relations, everyone agreed that it was a delicious meal, a very tender and subtle cut of meat, and a lovely way to cook it. But Pooh learned the lesson of always, always asking for the price ahead of time.


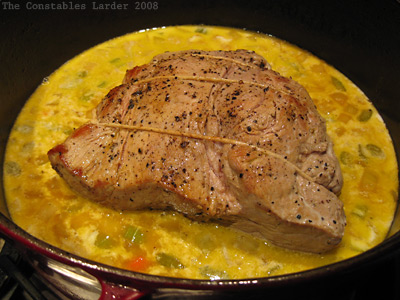
veal in milk

Veal Braised in Milk, adapted from Tori Ritchie's Braises and Stews

1 3lb boneless leg of veal
1 vidalia onion, chopped
1 celery stalk, chopped
1 carrot, chopped
3/4 cup Riesling (on the sweet side)
whole milk
coarse sea salt
coarsely ground pepper
olive oil

An hour or so before cooking, wash and dry the veal. Rub it all over with 2 or 3 tsp of coarse sea salt and 1/2 to 1 tsp of coarsely ground pepper. Let the meat come to room temperature.

Preheat the oven to 320F.

Set the flame to medium-high and heat up a couple tbsp of olive oil in a dutch oven large enough to hold the veal, and when the oil is quite hot, brown the sides of the veal. Set the meat aside and lower the heat to just below medium.

Add the chopped onion and cook for a minute or two, then add the celery and carrot and the wine, stirring and scraping the browned bits on the bottom of the pot. Cook for about 5 minutes and return the meat and any juices to the pot. Pour in enough milk so that it comes halfway up the side of the meat. Bring the milk to a boil, then cover and place in the oven.

After an hour, flip the veal. If it looks like the liquid is bubbling a little too much, lower the oven temperature to 300F. Cook for another hour, and check tenderness with a fork.

Remove the veal and tent with aluminum foil. The milk in the braising liquid will appear quite coagulated but that is expected. Let the liquid cool for a several minutes, taste it for salt and pepper, then carefully puree it in a food processor or blender.

Slice the meat, spoon the sauce on top, and serve.

* * *

Any resemblance between me and the Pooh character above is entirely coincidental. But what an amazing coincidence! The meal (which happened several weeks ago) was truly delicious, and I comforted myself with the thought that I fed 5.5 people (counting Munchkin) a restaurant-quality dish for a lot less than if we had eaten out, however I still felt like a bit of an ass.

When I was next at Fleishers up in Kingston, a butcher shop where I feel a lot more comfortable, I asked the owner Josh Applestone about butcher etiquette. He agreed that once I had let them cut the meat, I had to buy it ("that is, if you wanted to ever go back there!" he laughed). He also thought that the cost was rather high, and noted that some butchers carry veal because they can get away with sky-high prices. It was foolish of me to allow myself to get intimidated, and to fail to learn the price before I made a decision, but lesson learned.

I don't know that I will be splurging again on such a cut anytime soon, but it was a very interesting cooking method, and I might try it again on veal shoulder, if more reasonably priced, or some very good quality pork.