Showing posts with label Comfort. Show all posts

Sunday, December 28, 2008

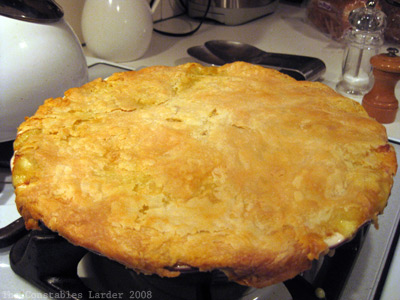
Chicken Pot Pie, the Basics

chicken pot pie

::: Constables Larder has moved to http://constableslarder.com :::

On Saturday, we crawled through traffic back up the Eastern seaboard and returned from visiting family in Washington DC. There are few things more soul destroying than hours stuck traffic. Naturally, I needed to make a chicken pot pie to recuperate. Chicken pot pie is scientifically proven to pack high levels of emotionally recuperative bosons and gluons by the ounce.

It is a little known fact that they plan to test FermiLab's Large Hadron Collider by accelerating a chicken pot pie to the speed of light and thus duplicating comfort food conditions at the origins of the universe. It will either cause the end of the world, or it won't; there appears to be some debate, which is comforting in and of itself.

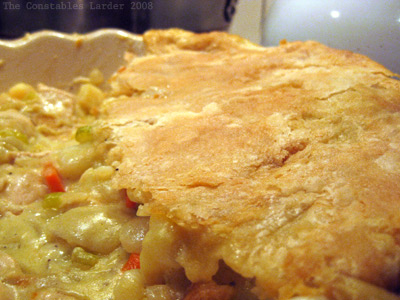
Below is a recipe for a simple pot pie, and a decent framework for elaborating upon with other ingredients (leeks, peas, turnips, parsnips) and herbs (parsley, rosemary, oregano, tarragon, etc). Note: I hope you'll excuse the hack-job of the pastry edging in the above picture... I was moving fast in a race against the clock for Munchkin's dinner time.

Chicken Pot Pie

1.5 lb chicken breast, cut into 1/2 inch cubes
2 medium red potatoes, cut into 1/4 to 1/2 inch cubes
1 white onion, diced
3 medium/large garlic cloves, peeled, woody end removed, and minced
3 medium carrots, sliced into 1/4 inch rounds or smaller
3 celery stalks, cut into 1/4 inch slices
1 tsp ground savory (alternative: 1 tbsp parsley and/or 1/2 tsp dry thyme)
1/2 cup dry white wine
salt and pepper
olive oil
5 tbsp unsalted butter
1/2 cup flour
2 cups milk
2 cups chicken stock (or water)

Pastry
1 1/4 cup flour
1/4 tsp salt + a couple more pinches
7.5 tbsp butter
approx 5 tbsp ice cold water

Egg wash: 1 tbsp water, 1 egg yolk

Making the Pastry
For this pot pie, I decided to work off of Alice Waters' savory pastry proportions from The Art of Simple Food. I was only making the pastry for the top, so reduced the amounts from the 2 cups of flour in her book, keeping with her proportions (hence the extra pinches of salt to get to around 1/3 tsp).

Cut the butter into 1/4 inch cubes and place in the freezer for 15 minutes. Fill a glass with ice water and place next to your food processor. Combine the flour and salt in a food processor and pulse a few times to mix. Add the butter to the processor and add 4 tablespoons of the ice water, pulsing the mixture between each tablespoon.

Remove the mixture to a clean surface and gently work it together. If it is not holding together at all, add another tbsp of the ice water. When the crumbly mixture is just holding together (you do not want it sticky or wet, and it is ok to have a little still crumbly), form into a rough ball, wrap in plastic wrap, flatten, and place in the fridge for an hour.


Preparing the Filling

Preheat the oven to 375F.

Bring some lightly salted water to boil in a medium sauce pot and boil the potato until just tender, no more than 10 minutes given the small cut. Drain or remove to a bowl with a slotted spoon, and keep the sauce pot around for the white sauce.

Heat a splash of olive oil in a large saute pan on medium heat and brown the chicken, then remove to the bowl with the potato. Lower the heat to medium-low and saute the onions and garlic for a couple of minutes, then add the carrots. Cook for 5 minutes, then add the celery, ground savory (or other herbs), white wine, and a couple pinches of salt and pepper. Cook for another few minutes then turn off the heat.

At this point, turn to the sauce pot: melt 5 tbsp of butter on medium-low heat, then wisk in the 1/2 cup of flour and cook for a minute stirring regularly. Theoretically, it is best to have your milk and stock (or water) already at a near boil, but if you haven't had time or the energy to dirty another pot, it isn't the end of the world just to add them directly now. Cook at a gentle simmer for another 5 minutes. (If you like your pie really rich, you can add 1/4 cup of cream too)

Stir the white sauce into the saute pan with the vegetables and taste for salt and pepper. Then stir in the chicken and potato. Spoon the mixure into your pie dish until it is near the edge.
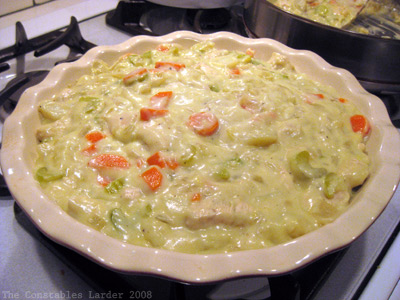
chicken pot pie fill
Photo note: the mixture looks a little green-ish because of the ground savory.

Finishing the Pie
Remove the wrapped pastry from the fridge, and on a lightly floured surface, with a floured rolling pin, roll out your pastry into a thin layer an inch or so bigger than you need for the pie dish. Lightly flour the top, to prevent it from sticking, and gently fold the pastry in half or in quarters to safely lift it in one piece to the top of the pie dish. Crimp the pastry around the edge of the pie dish, and then cut off any excess pastry hanging over the edge with a sharp paring knife. Make some vent holes in the top with the knife (or a fork).

If you have the time, it is nice to mix an egg yolk with a tbsp of cold water and brush this egg wash on top of the pastry. (I did not, this time around)

Place the pie in the oven (which was pre-heated to 375F) for 45 minutes, then let cool for 10 or 15 minutes before serving.
chicken pot pie

Saturday, November 8, 2008

Meatloaf Meets Thanksgiving Stuffing

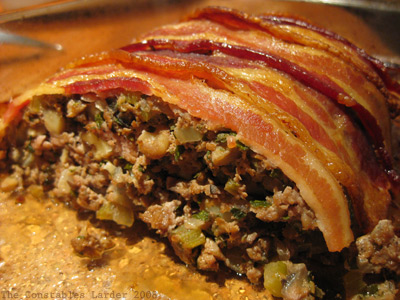
meatloaf cooked and cut

I love my mother's meatloaf recipe. Maybe that is not unusual, but I always find myself satisfied when I make it, and I am invariably disappointed when I try meatloaf in restaurants. The recipe for the original recipe is posted here, and I hope you try it.

Tonight however, as a prelude to the looming Turkey Day here in the US, I changed things up a bit and brought hints of Thanksgiving "stuffing" into my meatloaf. The reaction was gratifyingly positive, so I deemed it blog-worthy. Apologies for the less-than-great photo above, but it gives you a sense of texture.

(Note: what kind of stuffing do I love? It comes from a 1973 NYTimes recipe for Thanksgiving turkey that my mother cut out and we have been making ever since, because it is just that good!)

Meatloaf
1 lb ground beef
1 lb ground pork
1 large onion (spanish), finely chopped
8 white button mushrooms, finely chopped
3 stalks of celery, finely chopped
10 large black olives, chopped
1/3 cup walnuts, chopped
1 tbsp fresh sage, finely chopped (if you love sage, add more)
1 cup finely chopped parsley
1 tbsp worcestershire sauce
2 tbsp ketchup or tomato paste
1/2 tsp salt
1 egg
bacon

Pre-heat oven to 425F.

Heat up a splash of olive oil in a saute pan, and saute the onions until transparent. Add the mushrooms and cook for several minutes, and then add the celery. Cook for another 5 to 10 minutes, then turn off the heat and let cool.

In a large bowl, combine everything but the bacon. (note: I mix it all up with my hands, well-washed before and after)

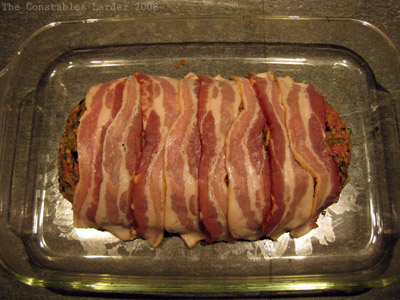
In a large baking dish, shape your meatloaf. I usually mold it into a roughly-rectangular shape about 1.5 to 2 inches high and 4 or 5 inches wide. Then drape slices of bacon across the top.

meatloaf prep

Place in the oven, and after 10 minutes, turn the heat down to 350F. Cook for another 50 to 60 minutes -- if the meatloaf is firm, it should be done.

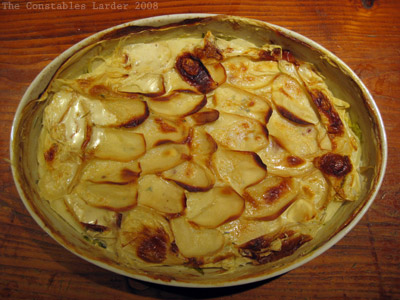
We served this with a potato, brussel sprout and celeriac gratin (in milk) -- good, but I want to continue to tinker with that recipe and improve it before blogging.

potato gratin

Stewed Meatballs with Arugula

stewed meatballs

::: Constables Larder has moved to http://constableslarder.com :::

What's not to love about meatballs stewed in tomato sauce? It's a timeless combination, no? I love to cook variations of a recipe I originally picked up from Jamie Oliver (I'm a big fan of his cookbooks). My original adaptation of the recipe is posted here. The other day, I remade it with some changes to the meatballs -- there are so many directions you can go and still have it be delicious, as long as you don't use spices that will conflict with your tomato sauce. The other major difference was the use of a big bunch of arugula instead of basil to add more body (I'm guessing that kale would be good as well).

For this variation, I created a simple tomato sauce that combined 20 oz of peeled san marzano tomatoes with some sauted onions and garlic, ground savory, dried oregano, a splash of red wine vinegar, and seasoned with salt and pepper.

Meatballs
1+ lb of ground beef
2 slices of italian / farm bread, pulsed into breadcrumbs
1/2 cup of finely chopped parsely
1 tbsp dried mexican oregano
pinch of hot red pepper flakes
healthy pinch of salt
1 egg

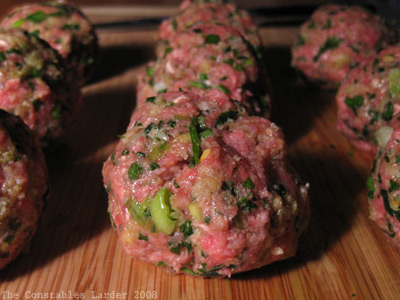
Combine everything and mold the mixture into meatballs. I made 9, each about an inch and a half in diameter. Then brown them in an oven-proof pan and then turn off the heat when browning is complete.

meatballs formed

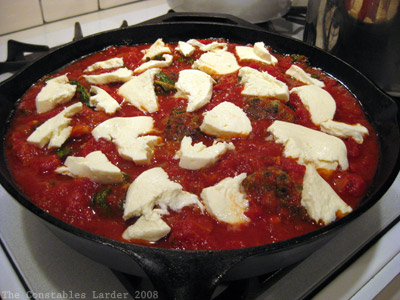
Once the meatballs are ready to go and the tomato sauce meets your approval, turn off the heat to the tomato sauce and stir in a large bunch of torn arugula leaves (my guess is about 5 oz worth - considerably more than the amount of basil that went into the original recipe).

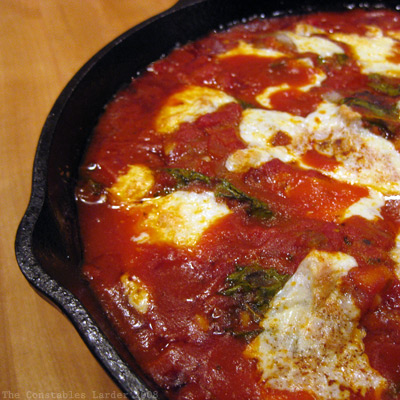
Pour the tomato sauce over the meatballs and add some chunks of mozarella cheese.

meatballs final prep

Place in an oven preheated to 400F and cook for 20 minutes.

Friday, October 24, 2008

Shepherd's Pie pt. 2 (riffing on Kali Orexi's riff)

shepherds pie pt 2

::: Constables Larder has moved to http://constableslarder.com :::

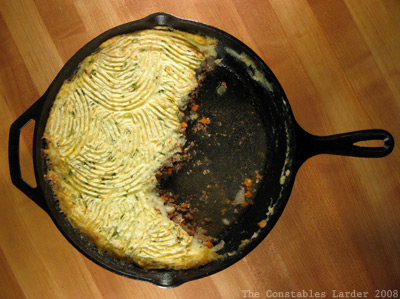
This is where the blogosphere gets fun. The other week, I blogged our usual Shepherd's Pie recipe. Today I discovered that Kali Orexi (aka Maria), a blogger also here in the New York area, made her version (link to her post). So tonight, I bumped my previous cooking plans and riffed off of her version (not having the exact ingredients in my pantry) and loved the result. Thanks Maria!

The key differences are adding grated cheese to the potatoes, and using a different spice base for the meat mix. In some ways, this version is richer than our usual and I was glad to have an Italian red wine with decent body to accompany. Then again, I'm always glad to have a full bodied red, who am I kidding!


Mashed Potatoes Topping
6 large red boiling potatoes, peeled
1 cup milk
2 tbsp unsalted butter
1/3 cup grated parmesan cheese (or pecorino romano)
salt and pepper

Boil the potatoes in lightly salted water until cooked all the way through (or steam them). You can cut them into smaller pieces to speed cooking. Drain the potatoes, return to the pot, add the butter and mash. Add 1/2 tsp salt, 1/4 tsp pepper, grated cheese, and 1/2 cup milk. Taste for salt. Continue adding milk until the mashed potatoes are quite moist without crossing over into being liquid.

The Base
1 lb of ground beef
2 large cloves of garlic, minced
1 1/2 medium onions, or 1 large, diced
3 medium carrots, diced
2 small/medium zucchini, grated
1 tbsp tomato paste
1/2 cup white wine
1/3 to 1/2 tsp ground cinnamon
1/3 to 1/2 tsp ground all spice
2 pinches of ground cumin
pinch of ground nutmeg
1 to 2 tbsp ketchup
salt and pepper

In a cast iron or oven-proof pan, brown the ground beef and use the spatula to break it up into small bits. Cook with a few pinches of salt, cinnamon and all spice. Remove any excess liquid and set aside.

Preheat oven to 350F

Add a little olive oil to the pan and saute the garlic and onions until the onions start turning translucent, then add the carrots and a few pinches of salt, cinnamon, all spice, cumin, a pinch of nutmeg and some ground pepper. Cook for several minutes, then add the grated zucchini and tomato paste. Once that is folded in and cooking, add the wine. Let this cook for several minutes and stir in the ground beef.

Cook it all together for another five minutes and taste for salt and spices (I kept the spices at a level where they were there but still subtle). At this stage, I wanted to sweeten the mixture up a little bit more, so added the ketchup.

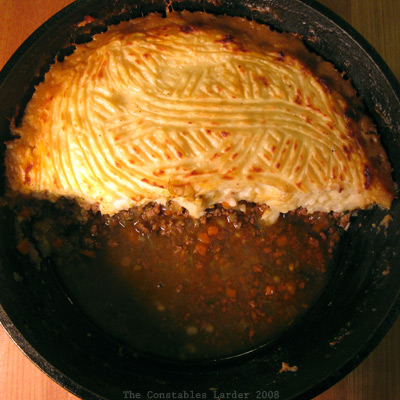
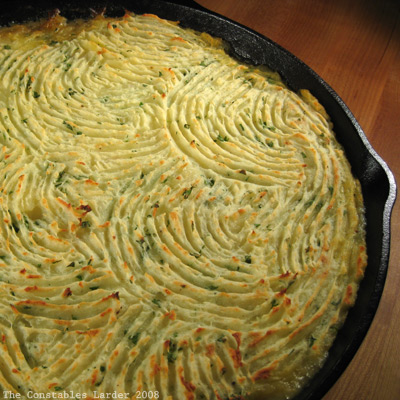
If the mixture starts to dry out, add a little bit of water. Once you are happy with the taste of the mixture, turn off the heat and flatten the top of the mixture. Carefully spoon your mashed potatoes on top, and using the back of a fork, smooth it around. As noted before, I like to then decorate the top with the tines.

Place in the oven and bake for 30 minutes, then turn the oven to broil and let the top brown (but not burn). Let the shepherds pie rest for a few minutes before serving.

shepherds pie pt 2

Tuesday, October 21, 2008

Doubled Braised Pork Chili

Chili (double braised pork)

::: Constables Larder has moved to http://constableslarder.com :::

I love chili, and this one is one of my best. I jokingly called it "double braised chili" because the pork shoulder is braised the night before, and then stewed in the chili the next day. I have also made the braise several nights before, served it as one meal, and saved the majority of the meat for cooking the chili.

Braising the Pork Shoulder (night before)
1 4lb bone-in pork shoulder or butt (upper part of shoulder)
3 dried ancho chiles, seeds and stem removed
1 dried chipotle pepper, seeds and stem removed
3 bay leaves
4 garlic cloves
2 tbsp salt
2 onions, chopped
1 green pepper, de-seeded and chopped (optional)
1 yellow pepper, de-seeded and chopped (optional)
2 cups dry white wine
water
olive oil

Pre-heat oven to 350F

Remove any excess fat from the pork shoulder. In a food processor, combine the ancho and chipotle chilis, bay leaves, salt and garlic and pulse until it is as finely chopped as you can get. Rub the mix all over the pork. In a dutch oven, lay a bed of the onions and peppers, and place the pork shoulder on top. Then pour in the wine and enough water to come a quarter of the way up the side of the pork. Cover and place in the oven, and after 20 minutes lower heat to 300F. Braise for 4 hours, turning the pork over halfway through. You can turn off the oven when you go to bed, leaving the dutch oven covered, and pick up the recipe in the morning.
You might also soak the beans overnight to speed things up the next day.

Making the Chili

Braised pork shoulder
3/4 cup dried pinto beans
3/4 cup dried mayacoba beans
3/4 cup dried vallarta beans
reserved bean cooking liquid
6 slices, thickly cut slab bacon
1 1/2 yellow onions, chopped
1 red onion, chopped
4 cloves garlic, minced
2 28 oz cans crushed or whole tomatoes (chopped)
1 1/2 tbsp tomato paste
2 jalapenos, sliced (with seeds)
2 tbsp ground cumin
1 1/2 tbsp dried mexican oregano
1 tbsp salt
3 bay leaves

Wash the beans and check for any small pebbles. In a large pot, cover with cold water, an inch over the top if they were soaked, and two inches if they were not. Bring to a boil, then lower heat, loosely cover and let simmer for about 40 minutes or until al dente. Remove beans and reserve the cooking liquid.

Remove the pork shoulder from the dutch oven, separate out the bones and excess fat, and using two forks shred the meat into bite size pieces. I used about 2/3 of the pork shoulder in the chili, saving the rest for lunch. Also reserve a ladel-full of the spicy braising liquid (albeit without the oil) and some of the vegetables.

Rinse and dry the dutch oven and place on stove top. Cut up the bacon into 1/2" pieces and saute in the dutch oven until almost crispy, then remove from pan and turn off heat. Drain or spoon out excess bacon fat, leaving a tablespoon or so in the pan (or remove all, and add in olive oil). On medium-low heat, saute the onions and garlic until onions are translucent, then combine the rest: beans, bacon, shredded pork, spicy liquid/vegetables from the pork braise, tomatoes, tomato paste, jalapenos, and herbs. Add enough of the reserved bean cooking liquid (or stock, if that is your preference) until the chili is moist, but not yet soupy.

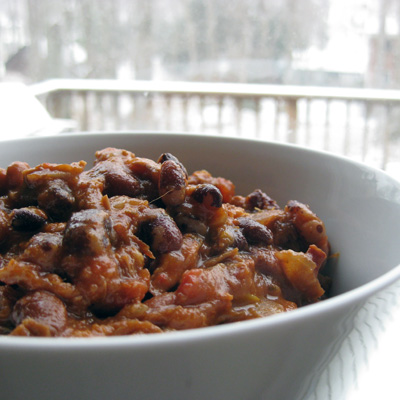
You can either cook this on the stove top at a very slow simmer or place in the oven at 280F. If the chili has too much liquid, let it cook uncovered for a bit (when I grabbed the above photo, it was still a bit too liquidy but still delicious). If it starts getting too dry, ladel in a little bit more of the bean liquid or stock you are using. Taste for heat, salt and spices and adjust to your fancy.

I usually cook this for several hours, giving the liquid plenty of time to concentrate and letting all the flavors mingle.

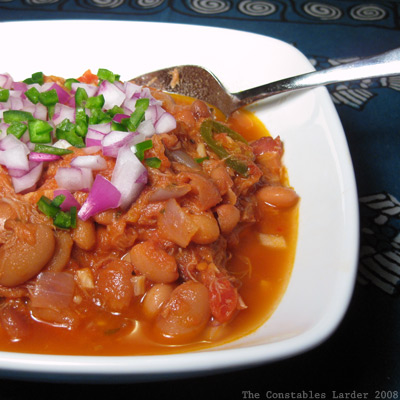
This chili was fantastic on its own, but we served with some raw chopped red onion, some freshly diced serrano pepper, and a dollop of greek yogurt.

Note on Beans
I have made this chili with various kinds of beans, and different amounts -- do not feel bound to the above recipe at all. For a recent version of this chili, I used 1/2 lb of vaquero beans (which were hearty and darkened the chili to a wonderful color) with 1/2 lb of pebbles beans. A common mix in the US is pinto with red kidney beans and great northern beans.

chili snow

Sunday, October 5, 2008

Shepherd's Pie (my favorite comfort food dish)

shepherds pie pan

::: Constables Larder has moved to http://constableslarder.com :::

Back in June, when we first started this site, I posted a number of old, favorite recipes including shepherd's pie. When the air gets cool, Lisl and I find no comfort food more satisfying than this dish. My version was originally inspired by the Dean & Deluca cookbook, and I make it slightly differently almost every time. Tonight was no exception, so I'll post tonight's approach here and note the differences to the old recipe at the end.

Shepherd's Pie

Mashed Potatoes (the top layer)
6 to 8 medium red or gold potatoes, peeled
1/2 cup milk (but be prepared to use more)
2 tbsp butter, cut into smaller pieces
salt
pepper
handful of parsely, finely chopped


Boil the potatoes in lightly salted water until cooked all the way through. You can cut them into smaller pieces to speed cooking. Drain the potatoes, return to the pot, add the butter and mash. Add 1/2 tsp salt, 1/4 tsp pepper, the parsley and milk. Taste for salt. Add milk - your exact amount of milk will depend on size and number of potatoes. You want the mashed potatoes to be quite moist without crossing over into being liquid. (Frankly, I would say make the mashed potatoes the way you really love to make them; just don't make it too dry as this all is going to bake before being served).
The Base
1 to 1.5 lb of ground beef
5 slices of bacon
2 tbsp worcestershire sauce
1 large onion, chopped
5 or 6 carrots, finely chopped
3/4 cup dry white wine
1 tsp tomato paste
1/4 tsp dried oregano
salt
pinch of red pepper flakes (spicy)

Cook the bacon in a large cast iron pan to the point where they are almost crispy, then remove and chop. Cook the ground beef in the bacon fat until browned, adding in 1/2 tsp of salt, 1 tbsp of worcestershire sauce, and the dried oregano. Once browned, remove to a bowl.

Preheat oven to 350F.

Add a splash of olive oil to the cast iron pan and saute the onions on medium-low heat until they start to turn translucent, then add the carrots. Cook for 10 minutes, stirring occasionally, then turn up the heat slightly and add the wine and tomato paste. Continue to cook, stirring regularly, for another 5 to 10 minutes, then add in the ground beef, chopped bacon, another tbsp of worcestershire sauce, another pinch of salt, and the pinch of red pepper flakes. Let this cook together for 5 or 10 minutes, stirring occasionally, and taste for salt and oregano. You'll note that I'm writing flexible cooking times, but I prefer more time when possible in order to let the carrots soften. If it starts to dry out, add a little more wine (or water or beef stock).

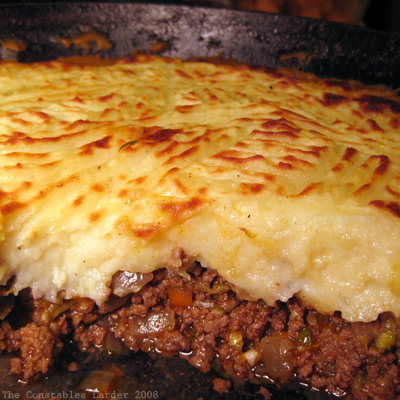
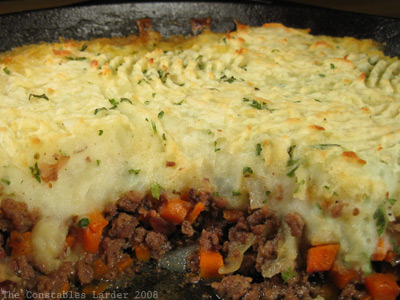
shepherds pie cut

Forming the Pie
Turn off the heat and flatten the mixture out. With a large ladel, place your mash potatoes on top carefully in dollops, trying not to allow the potatoes and meat base to mix. Take a fork, hold it mostly horizontal with the curve of the tines pointing down (like the bottom of a boat) and use this to spread the mashed potatoes around until it evenly covers the dish. I find that this allows you to spread the potatoes more delicately and thus prevents everything from mushing together. For aesthetics, I also like to use the tines of the fork to decorate the top with various patterns.

Place in the oven and bake for 30 minutes. Then turn on the broiler for a few minutes to brown the top, keeping an eye on it so it doesn't burn. Let cool for 5 or 10 minutes, then serve.

A couple years ago, Lisl discovered that this goes really well with a side-sauce of ketchup and sriracha sauce mixed together evenly. If you don't have Thai chili sauce, try Tabasco (if you like things spicy). This goes really well with a red shiraz or zinfandel, or a good beer.

Notes:
In the original recipe, the exact quantities of several things were slightly different. The other version also added 2 tsp of flour to the beef while cooking, used rosemary rather than oregano, and vermouth rather than white wine (I love cooking with vermouth), and included some beef stock. I started cooking this dish back in 2001 while we lived in London, and where "bacon" is more like what American's call Canadian bacon; I'll often use that instead of typical American bacon.

shepherds pie overhead
Yum.

Variations:
Shepherd's Pie with a more middle eastern spice combination
Original Shepherd's Pie recipe

Thursday, September 11, 2008

Favorite food locations; damn good corn fritters

Greece Trip 2002
Watching the Paris photos over at Stacey's Snacks has made me think about memorable food in far off places. I had only traveled around the US before I met Lisl, but marrying an Australian comes with a substantial increase of global travel. It seems to be part of the contract, but there are worse trades! I'm convinced that at any point in time at least 10% of the total Aussie population is overseas. While we've certainly had great meals all over the place (mussels in Bruges and some of the gastropubs in the English countryside outside of London come to mind), my personal top food locations are Greece and Italy.

In Greece, Lisl dragged me a little island called Serifos in the Cyclades. We had a friend that knew all the locals, so we got to experience the "authentic" restaurants rather than the fancy tourist places. In Italy, Lisl has so far "dragged"me (yeah, twist my arm) to Rome and the Cinque Terre. In Rome, we would wander around the streets and eventually see it - the place we *had* to have dinner that night. In both Greece and Italy, the produce was so fresh and the treatment brilliant and not over-complicated.

Where are your favorite food locations?

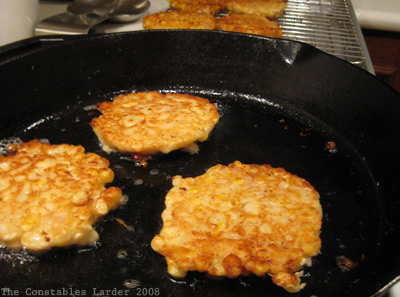
All this came back last night when we had a fabulous meal at the Greek restaurant Peryali in Manhattan, an old favorite. Speaking of Australians, the night before last I tried out an Aussie recipe for corn fritters that flat out rocked. It came by way of an old post from The Wednesday Chef and discovered through foodblogsearch.

corn fritter cooking

Paranoid me is going to post the ingredients here, on the off-chance that Wednesday Chef ever decides to take down her blog (I hope not but this is so good that I am resorting to a "backup"). To read about the process, please head over to her blog.

corn fritter sauce
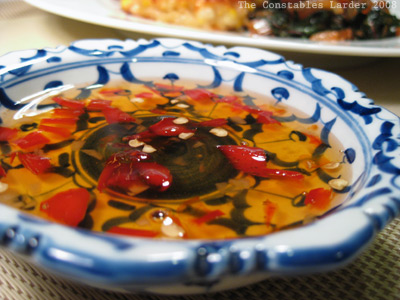
The dipping sauce

We had most of what the recipe called for, however we were out of scallions and cilantro (dammit!) and so swapped in shallots. I also only had 1/4 cup rice vinegar for the dipping sauce, so made up the difference with apple vinegar (it was still very good). The only change that I made voluntarily was to the batter, where I only used 1/4 cup of water and added 1/4 cup of beer (I love beer batters!).

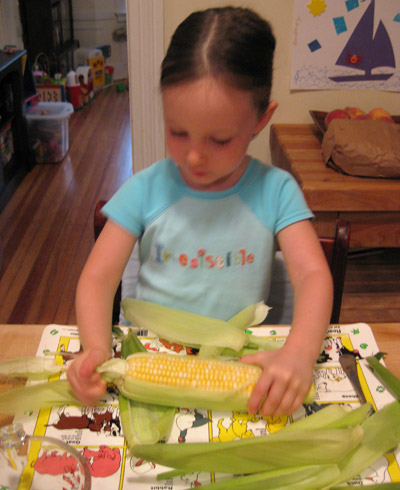
Munchkin was a very good helper.

kitchen helper

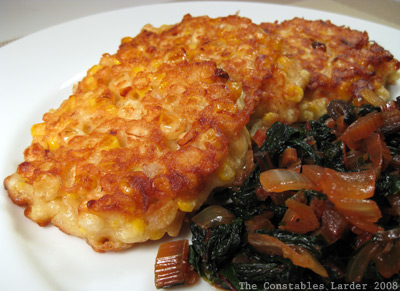
The fritters were served with swiss chard, with the leaves and stems chopped separately and sauted with a chopped onion in a couple tbsp of olive oil. I spotted this in Alice Waters' Art of Simple Food. Start by cooking the chopped chard stems for several minutes, then add the onion for several minutes, then the chopped leaves. Salt to taste (adding the right amount of salt is critical).

Ingredients for Corn Fritters

Dipping Sauce
1 red jalapeno, finely chopped
1/2 cup rice vinegar
1 teaspoon salt
1/3 cup sugar
1 small clove garlic, minced

Fritters
1 cup flour (or 1/2 cup all-purpose flour, 1/2 cup rice flour)
1/4 teaspoon baking powder
1/2 teaspoon salt
1 teaspoon ground coriander
1/2 teaspoon ground cumin
1 egg, lightly beaten
1 teaspoon lemon juice
1/2 cup water
2 cups corn kernels, cut from 3 large cobs
4 spring onions, finely sliced
3 tablespoons chopped cilantro
Oil

corn fritter plated

Sunday, August 31, 2008

Vegetarian Chili

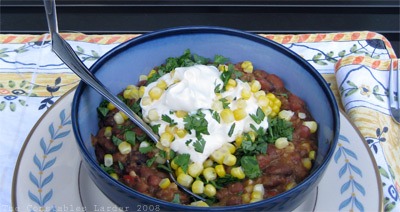
chili - bowl

The first project with my Rancho Gordo beans was a vegetarian chili using some of the fresh vegetables from the farm stand. This is another "get it all in the pot and let it cook for a while" dish. For this project, I used the Pebble beans, and of course you can use other, more commonly found beans (a common mix is kidney, pinto and great northern). The colors were a wonderful mix of browns and oranges -- it was like Fall in a pot.

Vegetarian Chili

Serves 4 - 6, depending on bowl size ;-)

1 lb pebble beans (or other bean mixture)
3 medium tomatoes
7 or 8 tomatilloes
2 red hot chili peppers
2 hot cayenne peppers (if available, otherwise use red chili peppers or jalapenos)
2 ears of corn (1 for chili, 1 for garnish)
2 onions (1 left whole, 1 chopped)
4 scallions, chopped
4 cloves of garlic, minced
2 bay leaves
2 tbsp ground cumin
2 tbsp fresh oregano, chopped (or half as much dried oregano)
salt
cilantro
natural greek yogurt

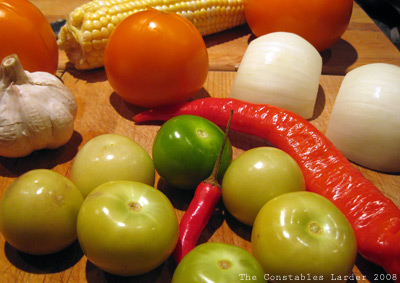
chili - ingredients
Just a few of the ingredients

Prepping the beans
Rinse and quickly pick over the beans to remove cracked beans or small stones. Soaking is optional (just requires longer cooking), but beans are easier to digest if you bring them to a boil for a couple of minutes, then turn off the heat to let them soak for over an hour. When done soaking, drain and rinse in a collander.

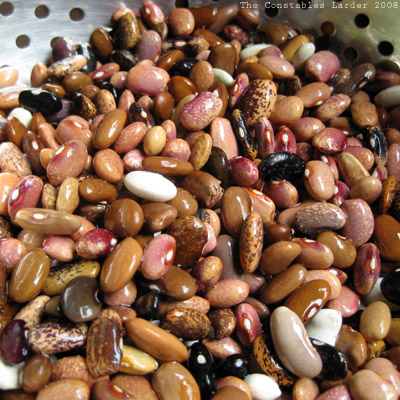
chili - beans
Rinsed Pebble beans, pre-soaking

Cooking the beans
Peel off the roughest outer layers of an onion and poke a few holes in it with a knife, making one large enough to insert a bay leaf. Place the rinsed beans and onion in a heavy bottomed pot (I like using my cast iron dutch oven), fill with cold water about an inch over the tops of the beans, and bring to a boil. Once the water is boiling, reduce to a simmer and cook for 45 minutes or so. Save at least 4 cups of the cooking liquid, and then drain the rest, putting the beans to the side in a bowl.

Cooking the Chili
Preheat the oven to 280F.

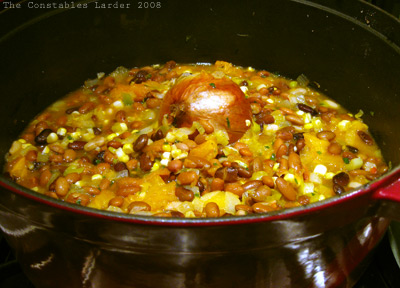
Chop up the onion and scallions, mince the garlic, and saute in the dutch oven on medium-low heat with a little bit of olive oil. If you have time to skin and de-seed your tomatoes, do so, then roughly chop them up and add to the pot. Remove the husks from the tomatilloes, dice, and add to the pot. Cut the kernels of an uncooked ear of corn and add to the pot. Add the oregano and ground cumin, 2 tsp of salt, and 2 of the hot peppers, minced. Finally add in the beans and a cup of the bean-cooking liquid, and mix it all together gently. As you will see in the below picture, I also kept and added the whole onion from cooking the beans.

Cover and place in the oven.

chili - cooking

At this point, you can cook on low heat for as long as you have (or can bear), but at least another hour. Check every 30 - 45 minutes and add more of the bean-cooking liquid if it is looking dry. I probably ended up adding at least two cups of liquid. About an hour in, I removed the whole onion and added a fresh bay leaf. Continue to taste for the desired balance of cumin, salt and heat from the fresh peppers, and adjust accordingly. I used 2 red chili peppers and 2 fresh cayenne peppers, but with fresh peppers heat can really vary so treat carefully if you have a sensitive palate. When you add more heat, let it cook until your next checkpoint before tasting again and adding.

Depending on your desired texture and aesthetics, if you want to thicken up the chili, put one or two large spoonfuls of the chili in a food processor and roughly puree, then stir back into pot. (Note: it isn't quite as pretty if you do this, but you do a get a wonderfully thick "comfort food" texture.)

Before serving, chop up some fresh cilantro and cook an ear of corn (method of cooking is of no matter - I microwaved it still in the husk for 2.5 minutes) and cut off the kernels. Add a dollop of yogurt (or sour cream) to each bowl and garnish with the fresh corn kernels and cilantro. Other nice garnishes are diced sweet red pepper, grated cheese, and diced red onion. It can be fun to serve each garnish in an individual bowl so your eaters can take their pick.

chili - served


Additional notes:
Using the oven isn't necessary, but I find that it reduces any risk of burning at the bottom of the pot (a handy thing if you get tied up by, say, a mischevous 3 year old and forget to check on it for a bit) and makes it easier to keep the chili at a low simmer. In my case, I actually started the chili yesterday evening and left it in the oven with the heat turned off when I went to bed (while placing the extra bean-cooking liquid in the fridge). When I woke up, I added some more liquid to the pot, brought it all to a boil again on the top of the stove, and then placed back in the oven for a few more hours.

If you don't have fresh hot peppers, you can use chili powder, but remember to start light (say, a tsp or two) and build up to the desired heat level, and you might also scale back the garlic, cumin, and oregano since chili powder is a mix of spices.

Finally, those of you who have been reading this blog are picking up that I am more about country/peasant/comfort food than haute cuisine. While I had to resist mightily from adding any meat to this chili dish, it came together well and was a filling and truly delicious meal.

Monday, August 18, 2008

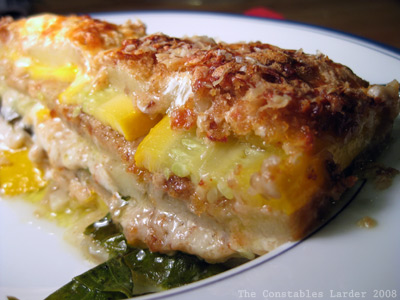
Eggplant, Zucchini & Basil Gratin

Eggplant & Zucchini Gratin
I seem to be on this vegetarian comfort food kick. Tonight's dinner was a lovely success, layering eggplant, zucchini, cheese, breadcrumbs and basil. I completely winged it (having only about 2 brain cells left to rub together after a late night and a long day) but at the first bite Lisl and I were both at "wow!" I suppose I shouldn't be surprised... melted veggies with gobs of cheese and olive oil? As Mr. Powers would say, yeah baby!

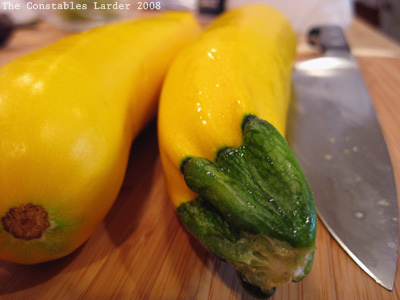
2 golden zucchini (green or summer squash would do as well)
2 medium Japanese eggplants
2 slices whole wheat bread
handful of basil leaves
mozzarella cheese
monterey jack cheese
parmesan cheese
extra virgin olive oil
salt and pepper

In a food processor, pulse your bread into breadcrumbs. Preheat oven at 350F.

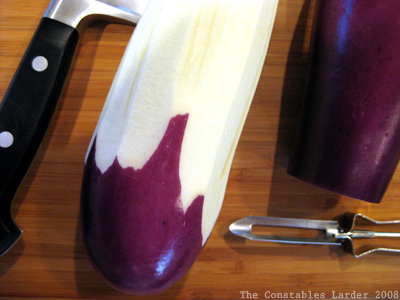
Peel the eggplant with a vegetable peeler and slice lengthwise into slices about a millimeter or so thick. Salt both sides and place in a collander to drain for about 20 minutes. Dry the slices with paper towel. Then slice the zucchini the same thickness (as best you can -- this dish is anything but scientific!).

Heat a large pan with olive oil on medium to medium-high heat and saute your batch of eggplant and zucchini, adding more olive oil to the pan between each batch. You don't need to cook the slices all the way - about 30-40 seconds a side should suffice in the hot pan - just enough to soften them.

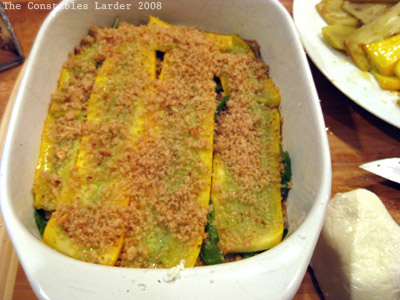
In a deep baking dish baking dish begin layering (hopefully you can get a sense of the size of my dish in the below pictures -- it is 3" deep). Place a layer of eggplant down first. (Note: don't be afraid to cut your slices of eggplant or zucchini into the necessary size to fit the gaps in a layer) Then grate a layer of parmesan cheese. Then add a layer of zucchini, a layer of breadcrumbs, and a layer of grated mozzarella cheese. Grind some fresh pepper and a little salt.

Add another layer of eggplant and then a layer of grated monterey jack cheese. Then lay down a layer of basil leaves, another layer of zucchini, a layer of breadcrumbs, and a layer of parmesan cheese and a little more fresh pepper.
eggplant zucchini gratin (layered)
Out of focus picture but you get the point...

Continue layering the eggplant and the zucchini, alternating cheese types with an occasional layer of breadcrumbs until you are out of vegetables (as I said... this isn't scientific). Grind some fresh pepper on the top, and put down a final layer of breadcrumbs and gratings of all three types of cheeses. Drizzle some olive oil over top.

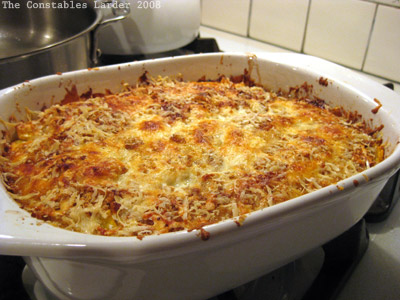
I baked for about 20 minutes at 350F, then got hungry and kicked it up to 375F for another 15 minutes, then let cool for a few minutes. You get a delightful crust and a totally melted core. The layer of basil really permeates this dish nicely. It's rich, but oh so satisfying. This dish can handle a hefty, peppery red wine should you be so inclined.

Eggplant & Zucchini Gratin (out of oven)

I'll end with a few "ingredients" pictures.

Eggplant
I love how this one came out.

Golden Zucchini

Thursday, August 14, 2008

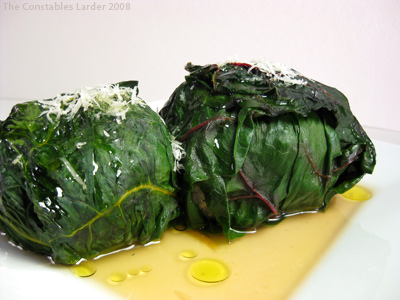
Chard Leaves Stuffed with Mushroom Risotto

risotto stuffed in chard leaves
Tonight I adapted Mark Bittman's post on Chard Stuffed with Risotto and Mozarella, which he in turn adapted from the restaurant La Zucca Magica in Nice. It makes for fabulous comfort food or a rich first course. Yum. If you make the dish, you might find his short video useful. It's also really fast to put together if you have made the risotto in advance. Did I say yum already?

My version was to make a mushroom and shallot risotto with chicken broth (Bittman went with a lemon-saffron risotto). Vegetable broth would work quite well for you vegetarians out there.

Shallot and Mushroom Risotto
(Makes enough for 6 medium-sized stuffed chard leaves)
2 tbsp butter
1 1/2 cup arborio rice
2 medium shallots, finely diced or minced
1 cup white button mushrooms, thinly sliced*
6 cups of stock (chicken or vegetable)
splash of dry white wine
olive oil
salt and pepper

Heat your stock (I used a homemade chicken stock) in a saucepan until it very lightly simmering.

In a thick bottomed pan, melt 2 tbsp of butter and a dash of olive oil over medium heat. When the butter has melted, add the shallots and cook for a minute or so, stirring regularly to prevent any sticking. Then add the mushrooms and continue cooking and stirring for several minutes until the juices from the mushrooms start to emerge. Add the arborio rice and stir it in until it is coated with the butter. Add a few turnings of salt and pepper grinders.

With a ladle, start adding the stock, never pouring more than 1/2 cup worth of liquid in at a time. Stir as continuously as you can bear (continuously is preferrable), and when most of the stock has been absorbed or evaporated, ladle in some more. You don't want the rice to ever get too soupy or too dry -- it should remain bubbling. After a few ladles-worth of stock, add a dash of dry white wine, stir in, then go back to adding stock.

Most cookbooks recommend that you start tasting your risotto after 20 minutes of cooking. You want the rice to be cooked but still have a bit of a crunch. In my case, the risotto took 25 minutes of cooking. If you don't have quite enough stock, continue with water.

* Note: many folks use fancier mushrooms for risotto, such as porcini or shitake; those are delicious, but button mushrooms are cheaper and still quite good.

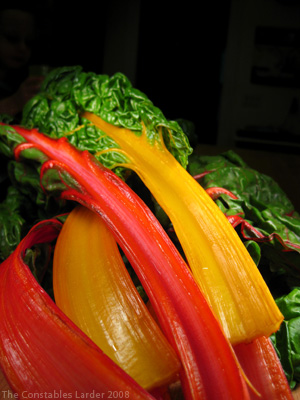
swiss chard

Stuffing & Cooking the Chard Leaves

6 Chard Leaves (or as many as you need)
Fresh mozarella, loosely diced
1/2 cup of broth (chicken or vegetable)
parmesan cheese, grated
olive oil

You'll want to let the risotto cool before you proceed to the next step (of course, you won't have this issue if you are using leftover risotto from the fridge). You'll want to have a medium to large chard leaf for each risotto ball you are making.

With a sharp knife, remove the thick stalk running up the center of the chard leaves, leaving the two halves of each leaf connected by 2 or 3 inches of leaf at the top. Then parboil the leaves in boiling water for about 30 or 40 seconds.

Using your hands, make medium-sized balls of the risotto (I went with about 2.5 inches in diameter). As Bittman put it, it's rather like making a small snowball. Then push in one side to create a cavity. Place a few pieces of mozarella in the cavity, then close up the ball around it.

Place the risotto ball at the point of the chard leaf where the two halves of the leaf connect, and the snugly wrap each leaf half around it until it is entirely covered.

Place the stuffed leaves snugly in a small/medium-sized baking dish, and pour some broth over top -- enough to fill the dish with about a half-inch of broth. Then bake for 20 minutes at 400F.

Serve by dribbling some of the broth from the baking dish over the top and add a dribble of olive oil and some grated parmesan cheese. Some fresh pepper is nice as well. Note: I decided that this particular rendition of the dish was better without the lemon zest garnish Bittman uses in his version.

parmesan

In the spirit of experimentation, I played with using collard green leaves as well for the wrapping and the verdict was clear: the chard was absolutely delicious; the collard greens were very quickly voted off the island!

A big thank you to La Zucca Magica and Mark Bittman for bringing this one to the rest of the world. Did I mention "yum"?

Sunday, August 3, 2008

Sunday Easy: black bean grilled cheese with roma beans

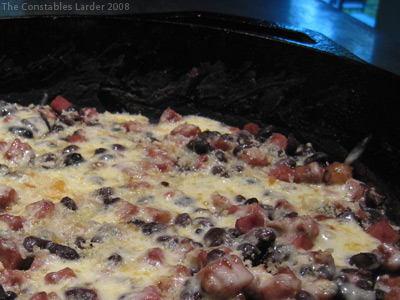
Sunday was a gorgeous, remarkably cool day in the Catskills and we visited some friends for a feast of a lunch. We didn't have much time for dinner but I whipped up some fast and yummy "comfort food". I have no idea what it should actually be called - "black bean grilled cheese" sounds about right (although not a sandwich).

My base was some unused black beans left over from Saturday night (an experiment with Poblano peppers that went horribly wrong - "don't ask, don't tell" is my policy for that dog's breakfast kthxbye). Thankfully this meal came out delicious. Redemption! (although, smoked ham and a layer of melted jack cheese? what a shoo-in!)

Black bean Fry

Black Bean Grilled Cheese (for lack of a better name)

The following amounts served 2 and 1/4 people pretty well

Smoked ham, cubed, about a cup's worth
Cooked black beans, about 1 1/2 to 2 cups
1/4 lb Monterey Jack cheese
1 tsp Ground cumin
1/2 tsp Paprika
Salt
Breadcrumbs

Cut hickory smoked ham into 1/4 inch cubes. Heat a dash of olive oil in a cast iron frying pan (or a pan you can place in the oven) and lightly brown the ham, stirring regularly, on medium-high heat. Lower the heat and add a 1 1/2 cups of cooked black beans (pre-made or canned). Add 1/4 cup of water, then 1 tsp of ground cumin, 1/2 tsp of paprika, and some salt to taste.

Stir in the spices and let cook for about 5 to 10 minutes together, adding small amounts of water if needed - you want it moist but not soupy. Turn off the heat, and sprinkle grated monterey jack cheese over the top, and then add a light layer of breadcrumbs. Place the pan under the broiler to brown the cheese and breadcrumbs -- depending on how close the pan is to the broiler heat, this can happen really quickly. This will melt the cheese and the toasted breadcrumbs will add a nice texture.

Note: if you are working with dried beans, you'll need to start a couple of hours earlier. Place in a pot with a bay leaf (and/or half an onion), cover with water, and bring to a boil, then simmer for about 1 to 1.5 hours until tender. Keep an eye on the water level and add more if it falls below the top of the beans. I'll also note that I almost never use bought breadcrumbs -- rather I just put a couple of slices of farm bread in a food processor.

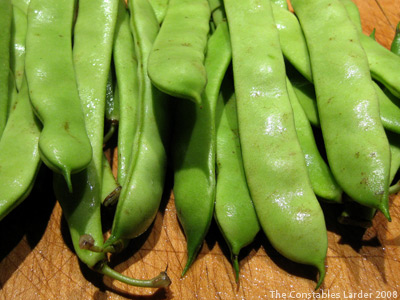
Roma Beans
Washed roma beans

I served the black bean concoction with some roma beans from our local farm. I'd never cooked roma beans before, but they looked great and the nice lady at the farm stand said to treat them just like green beans. I nipped off the ends and boiled them for about 3 minutes and tossed with a small amount of salt and butter, and they were wonderful.

Saturday, July 5, 2008

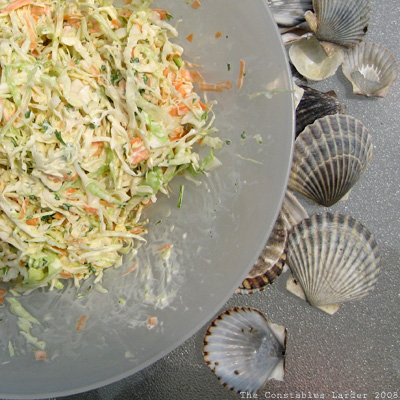
Cole Slaw - just lemon, and hold the sugar!

Cole Slaw recipe
Summer picnics often mean cole slaw, but I'll come right out and say that I hate most American cole slaw, primarily because of the insistence on making it sweet, not to mention the overload of mayonnaise. Bleaghh! (now you get to guess what sound I am intending when I wrote that word)

In my mind, a great cole slaw is a simple one. I inherited this simple recipe from my parents, and I've never run across a superior recipe. This is exactly what we made for a family 4th of July gathering yesterday:

1 green cabbage
4 lemons
2-3 carrots (or 1 really big one)
big handful of parsley
salt & pepper
Mayonnaise (Ed. I typically just use Hellmann's, although my understanding from Lisl is that Aussie's definition of mayo is a bit different so I'm not sure what a good off-the-shelf equivalent would be outside of the US)

With a long chef's knife (8" or longer), shred the cabbage as thin as you can (don't be afraid to chop it up a little more if you feel your shredding job is a bit too chunky). Place in a large bowl. Peel your carrots, discarding the outside peelings, and then using the peeler, cut long, thin strips of carrot turning the carrot in your hand as you go so you are working all around the carrot's circumference. Depending on the carrot, you may want to discard the woody inside core. I usually then quickly chop up the peelings a bit so that no piece is longer than an inch or two. Add the carrot to the bowl, as well as finely chopped parsely.

Squeeze the juice of 4 lemons into the bowl (can always increase or decrease number of lemons to taste). Halve or quarter the lemons and then squeeze into your free hand, keeping your fingers close enough together that you can catch and discard any lemon pits. Add a light amount of salt and pepper.

Estimating the amount of mayo is a "feel" thing that depends on how much you love mayo. I tend to err on the lighter side, but for a full cabbage this still ends of being between 4 and 6 big tablespoons. The key is to mix and taste as you go (like salt, you can't really pull it *out* of the dish once in). You can also add more salt and pepper to your taste in this step.

The result is a fresh and tasty cole slaw that goes great with a barbecue meal (which is exactly what we did). I've also done this recipe with dill instead of parsely and liked the results.

For an interesting and different take on cole slaw, check out the Lime and Peanut recipe over at 101 Cookbooks.

P.S. the scallop shells in the picture have nothing to do with the dish, they just happened to be on the table as the girls had been collecting shells on the beach earlier.

Friday, June 20, 2008

Mulitmedia seven-layer dip

Last night, I went to a friend's house for drinks, where one of the snacks was seven-layer dip. It brought back great memories of my old friend Laurie Kesselman, who made an excellent version of this for many get-togethers on her roof in the West Village, as well as my baby shower and numerous other parties - she was a real pro at it. It's really quite delicious and satisfying!

For those unfamiliar with this dish (i.e. Australians), it's a great tex-mex vegetarian (usually) party dish that's good for any season. The basic concept is layering beans, guacamole, sour cream, chopped up green (spring) onions, diced tomatoes, chopped black olives, and shredded cheese, or you can add in green peppers, jalapeno, ground beef, or anything else that takes your fancy. I went hunting for a recipe online and found so many - you can start from scratch with making your own refried beans, or make it up from seasoning mixes and pre-prepared dips from the supermarket. You can even serve the beans hot under all the other ingredients.

I really like the Food Network's version, which uses lots of fresh herbs and lettuce and healthier substitutes for some of the ingredients, such as greek yogurt for the sour cream and rinsed canned black beans instead of canned refried beans - a picture and the recipe is below. But for pure entertainment value, take a look at this video on startcooking.com. Cool!


Food Network's Six Layers and a Chip Dip
From Food Network Kitchens

2 cloves garlic
2 teaspoons kosher salt
1(15-ounce) can black beans, drained and rinsed
1 (15-ounce) can pinto beans, drained and rinsed
2 teaspoons chili powder
2 tablespoons water
1 tablespoon extra-virgin olive oil
2 cups lowfat shredded Cheddar
2 ripe avocados, preferably Hass
1 jalapeno, stemmed, finely chopped, (with seeds for more heat)
2 cups chopped romaine lettuce
1 1/2 cups nonfat yogurt, preferably Greek
1/2 cup fresh cilantro, leaves and some stems, roughly chopped, plus more for garnish
3 ripe medium tomatoes, diced
5 scallions (white and green), thinly sliced
Baked tortilla chips, for dipping

On a cutting board, smash the garlic cloves, sprinkle with 1 teaspoon of the salt, and, with the flat side of a large knife, mash and smear the mixture to a coarse paste. Put the garlic, beans, chili powder, water, and olive oil in the bowl of a food processor and blend until smooth. Spread in the bottom of a 2 quart casserole or gratin dish, or in individual sized dishes, as desired.
Scatter the cheese over the beans. Halve and seed the avocados, then mash with the jalapeno and another teaspoon of salt in a small bowl. Spread a layer of the avocado over the cheese, and then scatter the lettuce on top.
Mix the yogurt with the cilantro and then spread over the lettuce. Add a layer of tomatoes and finally scatter the scallions on top. Chill until ready to serve. Garnish with a few cilantro sprigs and serve with baked chips.

Sunday, June 8, 2008

Gourmet Mac & Cheese

mac and cheese

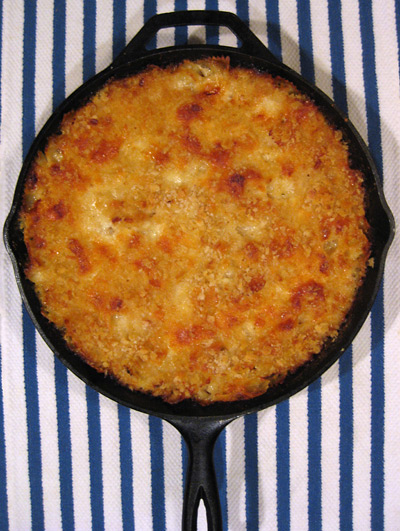
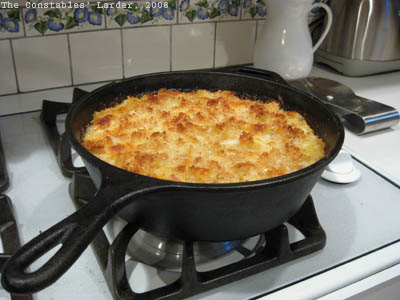
I believe that this recipe originally came from a Gourmet magazine, which I adapted to simplify. It is rich and very delicious.

1 lb tube shaped pasta such as rigatoni or penne rigate (Campanelle is also very nice)
salt
2 tbsp butter
1 medium yellow onion, peeled and coarsely chopped
1 clove garlic, peeled and minced
1 sprig fresh thyme
1 sprig fresh rosemary (optional)
1/4 cup dry white wine or vermouth
2 tbsp flour
3 1/2 cups milk
2 tbsp Dijon mustard (ideally whole grain)
1 lb aged cheddar cheese grated on large holes of a box grater
ground pepper
1/2 cup coarse bread crumbs (make by putting stale or fresh bread, crust removed, through a food processor)

1. preheat oven to 400. Cook pasta in a large pot of boiling salted water for 5 to 7 minutes -- you do not want the pasta to be fully cooked. Drain, then rinse under cold running water in a collander.

2. melt butter in a large saute pan over medium heat (I like to use a cast iron pan so I only have one pot to wash). Add onions, garlic, thyme, and rosemary (if used) and cook until onions are soft, 8-10 minutes. If you do not have fresh herbs, use a pinch of dried thyme. Add wine and cook for 2-3 minutes. Remove and discard the sprigs of herbs (if you used dried herbs, just leave in the mix). Whisk in flour and cook, stirring for 1 minute. Gradually whisk in milk then mustard. Reduce heat to keep the sauce at a gentle simmer and cook, stirring constantly, until thick and creamy (about 30 minutes). Remove pan from heat and stir in most of the cheese, leaving about 1/2 to 1 cup of cheese for the top. Stir in the cheese a handful at a time, stirring until completely melted after each addition. Season to taste with salt and pepper.

3. fold pasta into sauce and stir until well coated. If your pan is not oven-proof, transfer everything to a baking dish. Scatter the remaining cheese on top, then sprinkle with bread crumbs. Bake until crust is golden, about 25 minutes.

Mac and Cheese
I prefer making this in a wide cast iron frying pan, but it also works with a narrower, deeper pot such as the above.

Mom's Meatloaf

This is an old family favorite, and I have yet to find a restaurant meatloaf that is better. As usual, I picked up this recipe watching Mom in the kitchen and so amounts are not exact, especially with the seasonings.

2 pounds ground beef
2-3 stalks celery, diced
6-8 white mushrooms, diced
1 medium onion, diced
1 egg
1 tbsp worcestershire sauce
1-2 tbsp ketchup (or tomato paste with a little water added)
1/2 tsp oregano
1/2 tsp salt
1/8 tsp pepper
parsley
bacon
breadcrumbs (optional)

» (Optional) Saute the onions until translucent, then add mushrooms, celery and herbs and cook for a few minutes. This step can be skipped if you like your veggies a little crunchier.
» Combine everything in a large mixing bowl except for the bacon. If you first sauted your vegetables, let that cool a bit before putting in the bowl and adding the egg. Mix up the ingredients with your hands until everything is evenly distributed.
» Take out a large baking dish and shape the meatloaf.
» Lay strips of bacon on top of the meatloaf (you can trim extra fat or cut them to the proper length). I typically lay them across the width, and lay the bacon so that each piece is touching the next.
» Preheat oven and cook at 425 degrees (F) for about 10-15 minutes, then turn down to 350 degrees. Test the meatloaf for firmness to see if cooking is finished, but it usually takes about an hour.

My Shepherd's Pie

::: Constables Larder has moved to http://constableslarder.com :::

This is my version of Shepherd's Pie, inspired by a recipe in the Dean & Deluca cookbook. I almost always cook this with ground beef, and the amounts below can be totally altered depending on your whim. I prefer to make this in a flat cast-iron skillet with decently-high sides that can be placed directly into the oven, but of course you can create this in non-oven-ready pots and combine everything in a baking dish.

Mashed Potatoes (the top layer)
6 to 8 medium red or gold potatoes, peeled
1/2 cup milk (or to your desired level of fluffiness)
2 tbsp butter
salt
pepper
parsely, finely chopped (optional)

» Boil potatoes (can cut them into smaller pieces to speed cooking) in salted water in a large pot
» Drain potatoes and mash. Add 2 tbsp butter, 1 tsp salt, 1/4 tsp pepper (parsley optional here). Add milk (may need more or less than 1/2 cup depending on amount of potatoes) to the point where potatoes are moist but not yet liquidy.

Base of Shepherd's Pie
1 pound lean ground beef (or ground lamb
)
1 tsp finely chopped rosemary
1 1/2 tbsp worcestershire sauce
2 tsp flour
1 medium yellow or white onion, minced
1/2 cup diced carrot
1/2 cup white wine or vermouth
1/2 cup beef stock (can be skipped)
3-4 bacon rashers (in U.S., canadian bacon; can use regular bacon too)
salt and pepper
1 tsp tomato paste

» Cook bacon thoroughly in a touch of olive oil in a large cast iron frying pan (or whatever pan you have). Remove from pan and drain most of the bacon grease.
» In same pan, brown the ground beef over moderate heat and season as you cook with 1/2 tsp salt, rosemary, and worcestershire sauce. Once browned, sprinkle with flour, stirring the flour in and let cook for another 4 minutes. Remove meat and drain excess grease from pan.
» Preheat oven to 350 degrees (F)
» Saute onion and carrot in frying pan and cook until onion is translucent. Increase heat slightly and add wine and stock, deglazing bottom of the pan with a wooden spoon or spatula. Cook for another 5 minutes until liquid is reduced by half. (Optional: add a tsp of tomato paste for a richer flavor)
» While this is cooking, chop up bacon into small bits
» Add meat and bacon back into pan and cook together for a few minutes, until the liquid turns into a nice thick sauce (if it gets very dry, add a little more stock or wine)

Combine and bake:
» If you are using a cast iron pan, your meat and vegetables are already in the pan as the bottom layer. Otherwise, move the mixture to a baking disk. Cover with the mashed potatoes. Smooth the top (easier with a fork, which also lets you make fun patterns) and bake in the oven, uncovered, for 40 minutes until heated thoroughly. I will often turn the heat way up at the very end to brown the top just a bit.