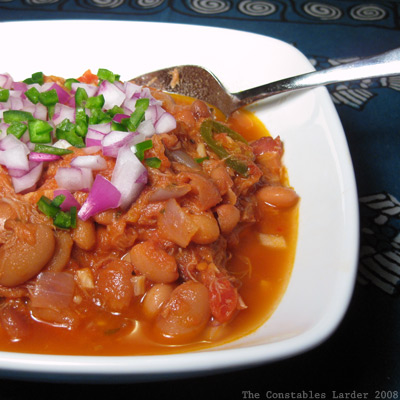
Wednesday, October 29, 2008

Skirt Steak rolled w Mushrooms and Ginger

No picture tonight, but then this is more of a note-to-self since I was surprised by how much I liked this spontaneous concoction tonight.

Skirt steak (just under 1 lb)
1 tbsp butter
1 yellow onion
Large handful mixed mushrooms
1 tbsp fresh, finely minced ginger
fresh flat-leaf parsley, finely chopped
apple cider vinegar
olive oil
salt and pepper

Peel your onion, cut in half, and slice into very thin half-rings. Clean the mushrooms (I used white button and "baby bella" mushrooms) and slice very thinly. Note: our skirt steak was quite small - fine for two people, but if you are making a larger amount, increase the amount of onion, mushrooms and ginger.

Melt a tbsp of butter and a splash of olive oil in a saute pan on low heat, and then cook the onions until they turn translucent. Add the mushrooms and continue cooking on low heat until everything is well cooked. Add a small pinch of salt and stir in the ginger. Cook for a minute or two then remove from heat.

Cut the skirt steak into two 8-to-10-inch long strips (our skirt steak was about 4 inches wide). Tenderize with a mallet to thin and widen the meat. Sprinkle salt, pepper and parsley on each strip, then add a layer of the mushroom mixture to the top.

Roll each steak strip up tightly and tie each roll at both ends with two lengths of wet kitchen string.

Sear the rolls on two sides quickly on a grill or under a broiler (hence wetting the kitchen string), then transfer to a small baking dish. Drizzle a little olive oil and a tsp of apple cider vinegar on each roll, then place in an oven set to 350F for 10 to 15 minutes. Remove string and serve.

Monday, October 27, 2008

Campanelle with Rabe and Fennel Sausage

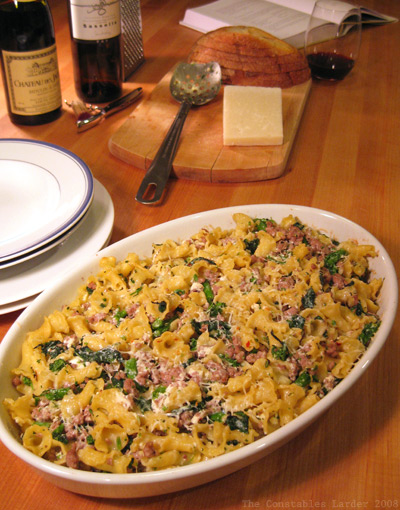
campanelle w rabe

Tonight we whipped together a relatively quick meal inspired by David Tanis' marvelous cookbook A Platter of Figs, which I've raved about previously. In his "winter" menu, he bakes orecchiette with broccoli rabe (rapini) and homemade fennel sausage, and below is our spin. We've followed a number of his methods, with the largest differences being that he makes his fennel sausage (without casings) in a separate process, and we also added a touch of chicken broth to keep the dish from being too dry (which we felt it was on first attempt).

6 or 8 servings

1 lb dried campanelle pasta
1 lb brocolli rabe, washed
1 lb ground pork
4 garlic cloves, minced
1 tsp fennel seeds
1/2 tsp red pepper flakes (hot), plus a pinch
1 tsp salt, plus a pinch
1 tsp chopped rosemary
unsalted butter
1/4 lb ricotta
1/3 cup chicken broth
pecorino cheese

Boil the pasta until very al dente in salted water, then remove from the water with a slotted spoon and place on a large baking sheet to cool, drizzling some olive oil on top. Bring the water back to a boil and blanch the broccoli rabe for a minute, then drain in a collander and let cool.

Pre-heat oven to 400F

With a mortar and pestle, crush the fennel seeds and 1/2 tsp of red pepper flakes. In a large saute pan, warm a little olive oil on medium heat, then begin to brown the ground pork, using your spatula to break it into smaller pieces. Stir in the fennel and red pepper flakes from the mortar, and add half the minced garlic and a tsp of salt. Stir together well and when the pork is browned, remove from the pan, drain any excess fat, and set aside.

Roughly chop the broccoli rabe. Then, add a little more olive oil to the saute pan, set it over medium heat, and add the remainder of the minced garlic. Fairly quickly, because you do not want to brown the garlic, add the chopped broccoli rabe, the rosemary, a pinch of salt, and a pinch of red pepper flakes. Stir everything together and turn off the heat.

Combine the pasta, sausage, and broccoli rabe, and chicken broth in a large bowl and gently stir together. Add the ricotta, in small pieces, and stir that in. (Note: we used store bought ricotta, but we really want to make our own)

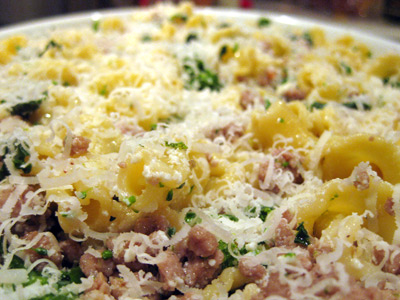
Butter a baking dish, and fill it with the pasta. Depending on the size of your baking dish, you may need to use two. Sprinkle a little pecorino cheese on top. At this point it will look like the below picture:

campanelle w rabe


Cover the baking dish and place in the oven for 15 minutes, then remove the cover and bake for 5 more minutes. Serve with some additional pecorino cheese grated on top or on the side.


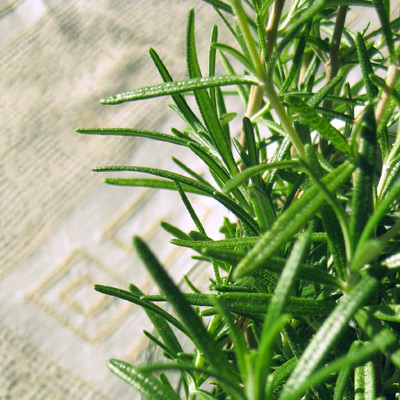
rosemary

Friday, October 24, 2008

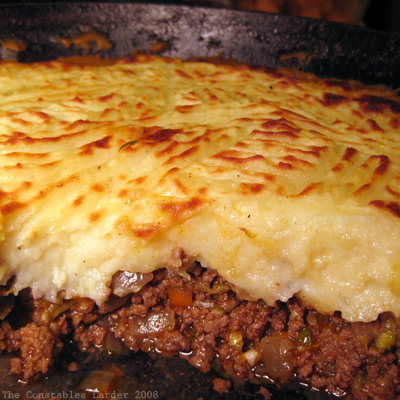
Shepherd's Pie pt. 2 (riffing on Kali Orexi's riff)

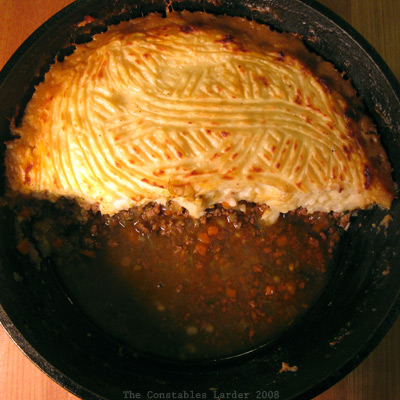
shepherds pie pt 2

::: Constables Larder has moved to http://constableslarder.com :::

This is where the blogosphere gets fun. The other week, I blogged our usual Shepherd's Pie recipe. Today I discovered that Kali Orexi (aka Maria), a blogger also here in the New York area, made her version (link to her post). So tonight, I bumped my previous cooking plans and riffed off of her version (not having the exact ingredients in my pantry) and loved the result. Thanks Maria!

The key differences are adding grated cheese to the potatoes, and using a different spice base for the meat mix. In some ways, this version is richer than our usual and I was glad to have an Italian red wine with decent body to accompany. Then again, I'm always glad to have a full bodied red, who am I kidding!


Mashed Potatoes Topping
6 large red boiling potatoes, peeled
1 cup milk
2 tbsp unsalted butter
1/3 cup grated parmesan cheese (or pecorino romano)
salt and pepper

Boil the potatoes in lightly salted water until cooked all the way through (or steam them). You can cut them into smaller pieces to speed cooking. Drain the potatoes, return to the pot, add the butter and mash. Add 1/2 tsp salt, 1/4 tsp pepper, grated cheese, and 1/2 cup milk. Taste for salt. Continue adding milk until the mashed potatoes are quite moist without crossing over into being liquid.

The Base
1 lb of ground beef
2 large cloves of garlic, minced
1 1/2 medium onions, or 1 large, diced
3 medium carrots, diced
2 small/medium zucchini, grated
1 tbsp tomato paste
1/2 cup white wine
1/3 to 1/2 tsp ground cinnamon
1/3 to 1/2 tsp ground all spice
2 pinches of ground cumin
pinch of ground nutmeg
1 to 2 tbsp ketchup
salt and pepper

In a cast iron or oven-proof pan, brown the ground beef and use the spatula to break it up into small bits. Cook with a few pinches of salt, cinnamon and all spice. Remove any excess liquid and set aside.

Preheat oven to 350F

Add a little olive oil to the pan and saute the garlic and onions until the onions start turning translucent, then add the carrots and a few pinches of salt, cinnamon, all spice, cumin, a pinch of nutmeg and some ground pepper. Cook for several minutes, then add the grated zucchini and tomato paste. Once that is folded in and cooking, add the wine. Let this cook for several minutes and stir in the ground beef.

Cook it all together for another five minutes and taste for salt and spices (I kept the spices at a level where they were there but still subtle). At this stage, I wanted to sweeten the mixture up a little bit more, so added the ketchup.

If the mixture starts to dry out, add a little bit of water. Once you are happy with the taste of the mixture, turn off the heat and flatten the top of the mixture. Carefully spoon your mashed potatoes on top, and using the back of a fork, smooth it around. As noted before, I like to then decorate the top with the tines.

Place in the oven and bake for 30 minutes, then turn the oven to broil and let the top brown (but not burn). Let the shepherds pie rest for a few minutes before serving.

shepherds pie pt 2

Thursday, October 23, 2008

Too many photo sites? + recipe links 10-23-08

food photo sites

Foodgawker, TasteSpotting, and Photograzing (Serious Eats) -- three food photo sites that people flock to. They are similar, and you often see the same pictures across all three.

These sites are a fun place to discover interesting posts and drool on your keyboard (careful with that). With the right photo, they can also be great traffic generators for a blog. A number of bloggers are taking the approach of posting their pictures on all three, but since time is perpetually limited, I would prefer to pick one.

In terms of site speed, they all seem comparable, and all seem to be relatively well-built. I doubt I will have time to get a sense for relative moderation / posting speed. Serious Eats has a large following, but I do not know how much of their traffic is also using Photograzing. According to Compete.com (not the definitive word by any means), Foodgawker has a slight lead now over Tastespotting.

Unfortunately, all of them insist on cropping images to a square. Sure, it makes the page layout more beautiful, but my camera does not take square pictures, and that is not how I frame my shots. I notice that Etsy's home page has a consistent landscape orientation for displayed images. I would love one of them to differentiate by embracing the non-square world.

So... which one do you prefer?


Recipe Links
I haven't had time in a while to post my "wannamakes", the amusing term someone applied to recipes you see and want to save for the future, so here is my batch since the last post (not including a few we already made and enjoyed):
Speaking of links, we enjoyed playing a part in Foodbuzz's 24, 24, 24 blog event, and they just created a neat little video now up on YouTube.

And I shall end the post, since it gave me a good chuckle, with a link to The Haphazard Gourmet Girls' alternative spelling/definitions for "locavore".

Tuesday, October 21, 2008

Doubled Braised Pork Chili

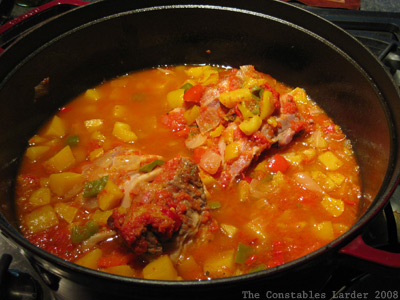
Chili (double braised pork)

::: Constables Larder has moved to http://constableslarder.com :::

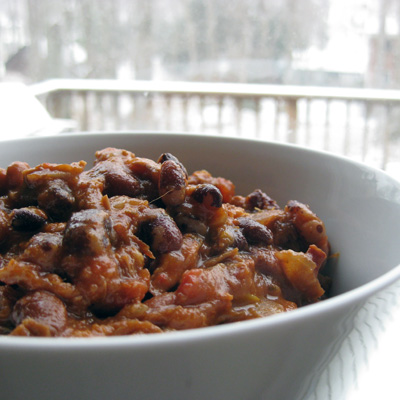
I love chili, and this one is one of my best. I jokingly called it "double braised chili" because the pork shoulder is braised the night before, and then stewed in the chili the next day. I have also made the braise several nights before, served it as one meal, and saved the majority of the meat for cooking the chili.

Braising the Pork Shoulder (night before)
1 4lb bone-in pork shoulder or butt (upper part of shoulder)
3 dried ancho chiles, seeds and stem removed
1 dried chipotle pepper, seeds and stem removed
3 bay leaves
4 garlic cloves
2 tbsp salt
2 onions, chopped
1 green pepper, de-seeded and chopped (optional)
1 yellow pepper, de-seeded and chopped (optional)
2 cups dry white wine
water
olive oil

Pre-heat oven to 350F

Remove any excess fat from the pork shoulder. In a food processor, combine the ancho and chipotle chilis, bay leaves, salt and garlic and pulse until it is as finely chopped as you can get. Rub the mix all over the pork. In a dutch oven, lay a bed of the onions and peppers, and place the pork shoulder on top. Then pour in the wine and enough water to come a quarter of the way up the side of the pork. Cover and place in the oven, and after 20 minutes lower heat to 300F. Braise for 4 hours, turning the pork over halfway through. You can turn off the oven when you go to bed, leaving the dutch oven covered, and pick up the recipe in the morning.

You might also soak the beans overnight to speed things up the next day.

Making the Chili

Braised pork shoulder
3/4 cup dried pinto beans
3/4 cup dried mayacoba beans
3/4 cup dried vallarta beans
reserved bean cooking liquid
6 slices, thickly cut slab bacon
1 1/2 yellow onions, chopped
1 red onion, chopped
4 cloves garlic, minced
2 28 oz cans crushed or whole tomatoes (chopped)
1 1/2 tbsp tomato paste
2 jalapenos, sliced (with seeds)
2 tbsp ground cumin
1 1/2 tbsp dried mexican oregano
1 tbsp salt
3 bay leaves

Wash the beans and check for any small pebbles. In a large pot, cover with cold water, an inch over the top if they were soaked, and two inches if they were not. Bring to a boil, then lower heat, loosely cover and let simmer for about 40 minutes or until al dente. Remove beans and reserve the cooking liquid.

Remove the pork shoulder from the dutch oven, separate out the bones and excess fat, and using two forks shred the meat into bite size pieces. I used about 2/3 of the pork shoulder in the chili, saving the rest for lunch. Also reserve a ladel-full of the spicy braising liquid (albeit without the oil) and some of the vegetables.

Rinse and dry the dutch oven and place on stove top. Cut up the bacon into 1/2" pieces and saute in the dutch oven until almost crispy, then remove from pan and turn off heat. Drain or spoon out excess bacon fat, leaving a tablespoon or so in the pan (or remove all, and add in olive oil). On medium-low heat, saute the onions and garlic until onions are translucent, then combine the rest: beans, bacon, shredded pork, spicy liquid/vegetables from the pork braise, tomatoes, tomato paste, jalapenos, and herbs. Add enough of the reserved bean cooking liquid (or stock, if that is your preference) until the chili is moist, but not yet soupy.

You can either cook this on the stove top at a very slow simmer or place in the oven at 280F. If the chili has too much liquid, let it cook uncovered for a bit (when I grabbed the above photo, it was still a bit too liquidy but still delicious). If it starts getting too dry, ladel in a little bit more of the bean liquid or stock you are using. Taste for heat, salt and spices and adjust to your fancy.

I usually cook this for several hours, giving the liquid plenty of time to concentrate and letting all the flavors mingle.

This chili was fantastic on its own, but we served with some raw chopped red onion, some freshly diced serrano pepper, and a dollop of greek yogurt.

Note on Beans
I have made this chili with various kinds of beans, and different amounts -- do not feel bound to the above recipe at all. For a recent version of this chili, I used 1/2 lb of vaquero beans (which were hearty and darkened the chili to a wonderful color) with 1/2 lb of pebbles beans. A common mix in the US is pinto with red kidney beans and great northern beans.
chili snow

Congrats Foodbuzz!

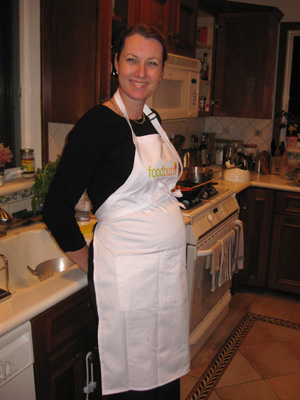
foodbuzz apron

We have enjoyed participating in the Foodbuzz community, and we've met some great people doing so. Congrats on your launch Foodbuzz crew! We were very sorry to miss meeting Ryan, Devon and others at the dinner here in New York last weekend, but hope everyone had a good time (we had a previous engagement).

Foodbuzz was generous enough to send us some swag as part of their launch, which Lisl is modeling above. And since you can't miss it in the photo, it seems like as good a time as any to share that munchkin is expecting a sibling in March. Kiddo is going to have to deal with... yes... a baby brother. So when, next April, this blog has nothing more than half-incoherent statements and out-of-focus photos, you will understand!

I can't say thank you to Foodbuzz without a slightly more serious message as well. I'm sure they are a little disappointed in not generating more PR with their launch announcement, but it has obviously been a tough time to get media attention. Since history, consensus and logic all point to the recession causing a pullback in advertising, long-tail plays like Foodbuzz will be a little challenging. Luckily foodies are a relatively attractive and focused group for advertisers, but times will no doubt be tight. I wonder if it will put more pressure on them to grow the main Foodbuzz website rather than overall network growth through the aggregation play, in order to give advertisers a focused location. If so, that might require making some shifts that make the site more mainstream friendly rather than as blogger-focused as it has been. In any case, from one entrepreneur to another, I'm rooting for you. So no more swag! We don't need it; save those pennies! And I hope we all weather this downturn and make our way to brighter days.

Sunday, October 19, 2008

Low and Slow roundup

low and slow graphicThank you to everyone who participated in the first Low and Slow blog event. As noted in the original post, we purposefully let the definition of "low and slow" remain broad, just asking that each submission be "a dish that requires long cooking (at least an hour) at relatively low temperatures where flavors mix together in delightful ways."

This was tough to judge, as there were many interesting submissions and different styles, but someone did have to take the cookbook prize, and that would be Kelly of Sass and Veracity. We met Kelly several months ago via Foodbuzz, and quickly became fans of her blog. Her submission was a brined pork roast, served with mushroom-sage polenta and collard greens.


Sass and Veracity
(Kelly)


Jugalbandi
(Bee and Jai) created "tempeh chili con frijoles", a vegan version of chili con carne. Love that photograph!


Stacey Snacks
(Stacey) made a delicious-sounding pork shoulder ragu which she served on a bed of penne pasta.


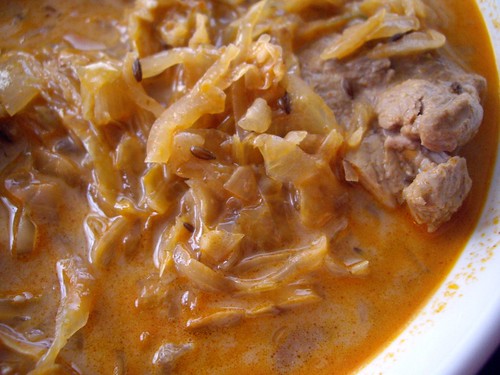
Columbus Foodie
(Becke) submitted an intriguing recipe: Transylvanian Goulash, which combines saurkraut, pork shoulder, and lots of spices.


Passionate About Baking
(Deeba) made a chicken curry with fenungreek (Methi Murgh).


Family, Friends and Food
(Patsy) braised beef short ribs with a mix of broth, tomatoes, rosemary, worcestershire, etc.


kopiaste
(Ivy) cooked a Greek sofrito, a veal steak slowly cooked in a white wine, garlic and herb sauce, from the Greek island of Corfu.


What Smells So Good
(Sarah) created a vegan version of pulled BBQ pork, using unripe jackfruit.


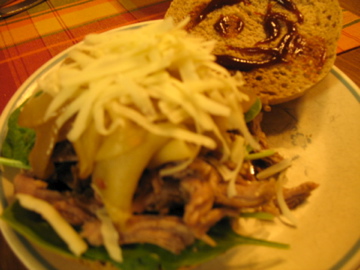
North Fork Foodie (Lisa) made a pulled pork sandwich with tangy apples and onions.


For the Love of Cooking
(Pam) dropped a link in the comments section of the original post to this wonderful recipe for a Mexican-flavored beef stew, as well as a more traditional French-style beef stew.


Priya's Easy N Tasty Recipes (Priya) created a spicy baked chicken with a Tandoori flavor.


Some recipes submitted didn't *exactly* fit the parameters, but were quite interesting:


Fun and Food Cafe
(Mansi) submitted an Indian-style Chana Masala (chickpea curry).


Dil Se
submitted a finger millet porridge (ragi koozh).


Bengali Cuisine
(Sudeshna) created a caramel pudding of bread crumbs, milk, eggs, and vanilla essence.


Finally, here is our own entry:

The Constables' Larder
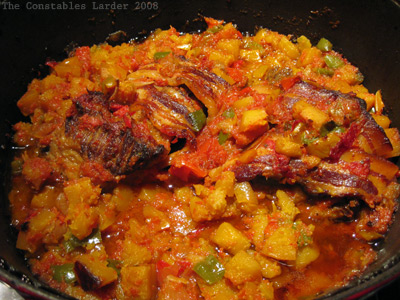
(that's us) braised a beef brisket with sweet peppers, carnival squash, slab bacon, cumin and paprika.

Thanks again to all the participants!

Friday, October 17, 2008

Drying Chilis

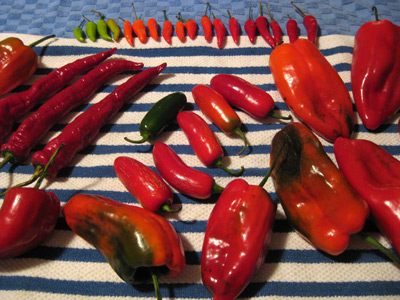
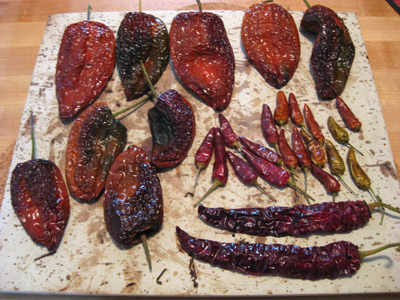
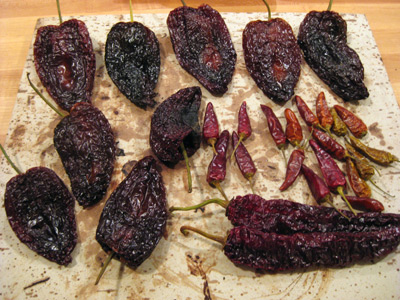
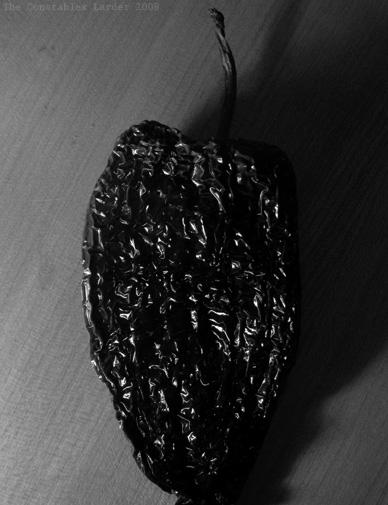
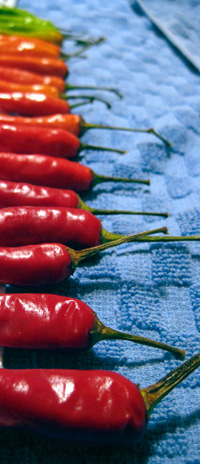
I have not tried canning yet, but my nod towards lengthening the "local" season consisted of drying my own chilis. I had some poblano peppers (which are renamed ancho chilis), cayenne peppers, and small, red hot peppers.

To dry them, heat oven to 170F. Place the peppers on a stone or tray in the oven. The small peppers dried out overnight, but the poblanos took all night and all the next day. I flipped the poblanos halfway through.

chili drying 1
Washed and dried before oven

chili drying 2
Partially dried

chili drying 3
Smaller peppers done; gave the poblanos more time

dried ancho

colored chilis

Do you say chili or chilli or chile? Ah the mysteries of the universe...

A Fun Week with the Blogosphere; Saffron Soup with Mussels

Even though work has been on the brutal side this week, we've had some great interactions with the food blogosphere. So first of all, thank you again to all who submitted to Low and Slow. I hope to get the posts up today or tomorrow.

On Wednesday night, Lisl and I went out for dinner in New York City with Stacey from Stacey's Snacks, a favorite blog of ours, and her supermodel husband Henry. It was a great dinner with lively conversation, and Henry showed wonderful forbearance as we geeked out for a bit on food blogs, photography, etc. Perhaps patience is a bit of requirement when it comes to food blogger spouses since the most common phrase heard by us all, after "this is delicious!", is probably "take the picture already!"

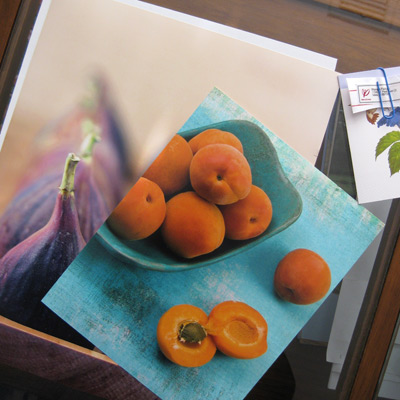
jugalbandi photosSpeaking of photographs, I received a wonderful treat in the mail yesterday from Bee and Jai over at Jugalbandi, another one of my favorite blogs. I've been in love with their photography for a while now, and they were kind enough to send me two prints that in short order will be framed and hung in our house. I love great art on the walls, particularly when there is a personal connection, so to say I am gleeful is putting it mildly.
Lastly, on Monday, Constables' Larder was a guest poster on The Haphazard Gourmet Girls blog, as part of their censored literature series. HGG is an interesting food activist blog. Readers know that we're not highly activist on this blog, but I really like strong, intelligent voices that are trying to make a difference. That fits HGG in spades, and Eddie, I hope we get a chance to meet you in person as well one of these days, maybe up on that old whaling island we both like to go to.

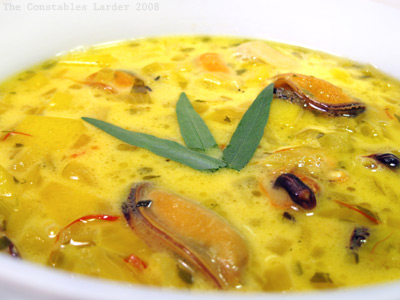
The full post is here (link), where we paired a dish with Kate Chopin's novel, The Awakening. I am not going to duplicate the full post and description, but I am going to re-post the recipe here, which I adapted from Simon Hopkinson's Roast Chicken and Other Stories.

saffron soup with mussels

Saffron Soup with Mussels, adapted from Simon Hopkinson

Serves 4

1/2 cup butter
2 large spanish or sweet onions, finely diced
2 garlic cloves, minced
2 tbsp Pernod
1/2 bottle of dry white wine
Leaves of 2 tarragon sprigs, finely chopped
1 bay leaf
Pinch of dried thyme
2 1/2 cups chicken stock
2 to 3 lbs mussels, de-bearded and washed
2 medium red potatoes, cut into 1/4 to 1/3 inch dice
1 tsp saffron threads
1/2 cup half and half or light cream
1/4 cup heavy cream
1 lemon
salt and pepper

In a large soup pot, melt the butter on low heat and cook the onion and garlic until translucent. Turn up the heat to medium, add the Pernod, and after 30 seconds or so, add the white wine. Add the chopped tarragon, thyme, and bay leaf. Bring to a boil and then reduce to a simmer for 15 minutes before adding the chicken stock and bringing the soup back up to a heavier simmer.

Hopkinson calls for putting the mussels in a large pot and straining the soup over them. I think it is easier to place a collander in a large bowl, and pour the soup into the collander thus separating the onions and herbs from the liquid. Toss the bay leaf and put the contents of the collander back in the soup pot, and pour the liquid in the bowl over the mussels in your second large pot. Bring that to a boil , cover, and cook until the mussels are just opening. To prevent burning yourself with splatter, remove the mussels to a bowl with a slotted spoon, then pour the remaining liquid through a fine sieve (or cheesecloth) back into the main soup pot.

Add the potatoes, saffron, and a few grindings of salt and pepper. Tread carefully with the salt - this soup does not need much. Bring the soup back to a boil and then simmer until the potato is tender. (Note: if you are in a hurry, you can partially boil or steam the potatoes earlier in the process). Turn off the heat, stir in the cream and the juice of half a lemon. Add salt, pepper, lemon juice to taste. Garnish with a few sprigs of tarragon and serve with some slices of a really good baguette and a medium-bodied red, like a young Rioja (nothing too fruity or too strong).

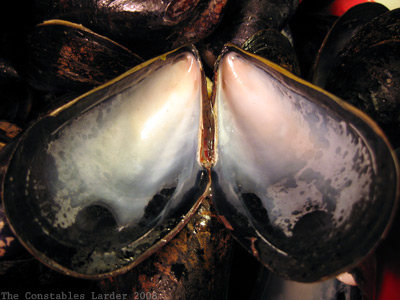
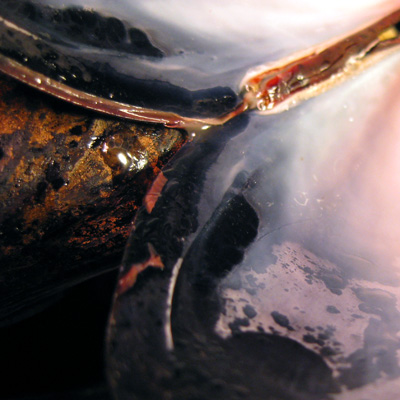
mussel shell

mussels

Monday, October 13, 2008

Images of Fall

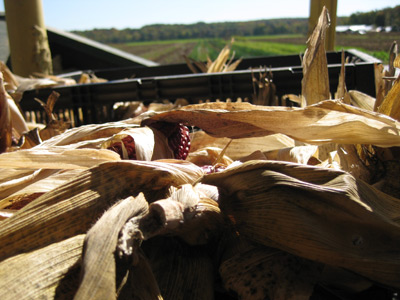
indian corn
Indian corn and emptying fields

golden sky
Golden canopies and a still-warm sun

fall trees
The mountain palette, procrastinating the grey

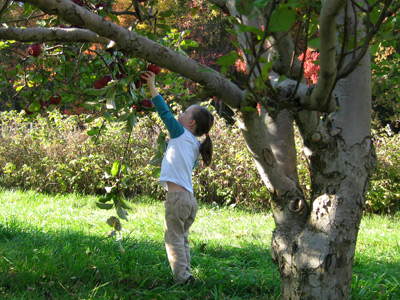
apple picking
The last bounties, a final discovery

apple
Merry days, and continual thanksgiving

fire bush
Revel in the reminder of seasons

lavender shadow
I'll look forward to long days once again

Ah, it was nice to be a locavore while it lasted... just a few more weeks, and then 'till next year!

Brisket braised in Sweet Peppers & Squash

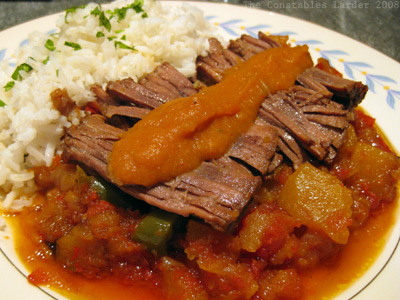
brisket done

My entry to the Low and Slow (link) blog event (you have until the end of Oct 15th to submit!) is a brisket braised in sweet peppers and carnival squash. I was inspired by a Boulud recipe for creole stew, and took it in my own direction. I had a wonderful cut of brisket and some slab bacon from my favorite butcher Fleishers, and vegetables right off the field from the local farm. It is coming to the end of the New York growing season, so I'm making the most of it! The end result was a "wow (long pause) this is good!" response from Lisl. And so with no further ado (and lots of pictures):

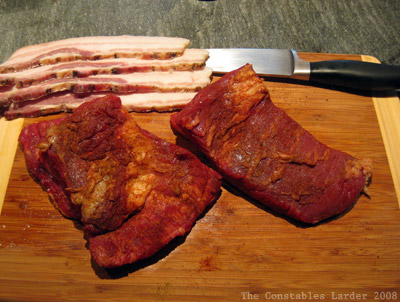
2 1/2 lb brisket
dry rub of salt, sweet paprika, and ground cumin
4 to 6 slices slab bacon
1 1/2 spanish onion, diced
3 cloves garlic, minced
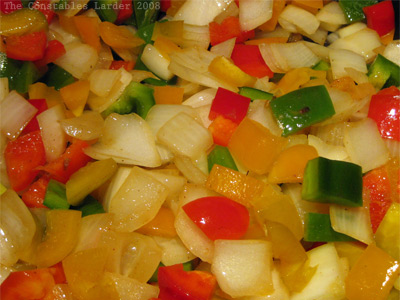
1 red, 1 orange, 1 green pepper, diced
1 carnival squash, flesh only, cut into 1/2 inch dice
7 or 8 plum or medium tomatoes
2 bay leaves
1 cup white wine
juice from 1 lime
black pepper
Olive oil

brisket rub

Preheat oven to 275F.

Take your brisket and rub a hearty amount of salt, sweet paprika (smoked paprika would also be great) and ground cumin. I would guess I used about a tablespoon of each. Note: I only cut the brisket in half to fit in the dutch oven more easily because it was a long cut.

brisket base

In a large oven-proof pot or dutch oven, saute the onion, garlic and sweet peppers in olive oil until the onion starts to turn slightly transparent.

brisket wrap

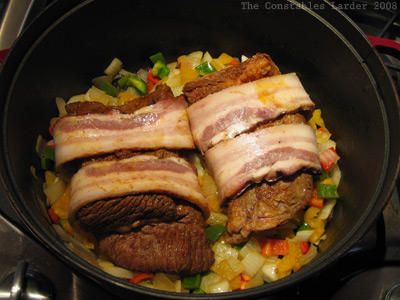
Keeping the pot on low heat, wrap the bacon around the brisket and place on top of the vegetable base. I had very thickly sliced slab bacon, and so with more normal bacon I would probably use a few more slices.

De-seed your carnival squash (a butternut squash would also be great), remove the tough skin, and chop it into 1/2 inch dice. Then add the squash around the brisket.

Halve your tomatoes across the middle (if it was the earth and the stem was the north pole, you would be cutting across the equator) and de-seed. Then place in a food processor with the two bay leaves and pulse until smooth. Pour this on top of and around the brisket, and then pour in the white wine. Cover and place in the oven for 4 or 5 hours.

brisket cooking

This is what the braise looked like after about 2 hours. At this point, you can taste the vegetable mixture for salt and add more if needed. Spoon some of the braising liquid over the top of the brisket, then return to oven.

After about 3 hours, I pulled it out and spooned off some of the excess fat on top of the liquid, and again spooned some of the remaining liquid ove the meat. When I placed the pot back in the oven, I left a very slight crack open on the lid to let some of the moisture out.

In total, I cooked the braise at 275F for just over 4 hours. As the cooking time gets on, you want to keep an eye on the amount of liquid so it doesn't dry out. If the braise is moist but only a little loose liquid remains, remove from the oven and keep covered until you are ready to serve. You can always reheat gently on the stove top.

Final step to serve

Make a sauce / gravy by taking two large spoonfuls of the vegetables and placing in the food processor with the juice of one lime. Add some ground pepper and puree. Add a little bit of water if you want to thin the consistency.

Take your brisket, discard the bacon, and with two forks, pull apart "slices" for serving, working with the grain. Taste for salt -- you will most likely want to add some more salt to the brisket itself even though the vegetables are probably fine at this point.

Braises tend to be difficult to plate beautifully for photos (although rustic bowls tend to work well). In our case, I served with some white rice (with a touch of cilantro sprinkled on top), and placed the meat on a bed of the braised vegetables, covered with the pureed sauce.

brisket served

So there you have it. Delicious! And now that I'm done writing, I'm curious: is that too many photos for this blog post? Let me know what you think.

P.S. Lisl had the clever idea of using some of the leftover brisket and lime-veggie sauce the next day for quesadillas, along with chopped tomato and grated monterey jack cheese. SO good.

Tuesday, October 7, 2008

Gigantes with Tomato and Fennel

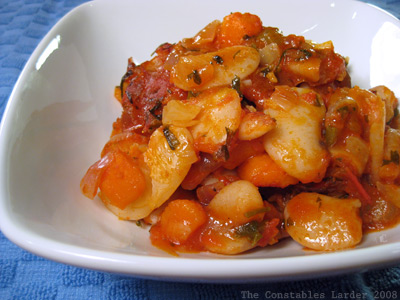
gigantes
I fell in love with Greek food the summer Lisl dragged me over to a tiny island called Serifos, and brought me to where the locals eat. Heavenly. I discovered a dish where large beans ("Gigantes") are cooked in a tomato sauce. I've been meaning to make it for years. I guess I was waiting for a starting point.

Enter the blogosphere. There are a number of Greek-oriented food blogs I enjoy, and one of my favorites is Kalofagas, by Peter Minakas. I discovered that he wrote about "Gigantes St Fourno" in Oct 2007. I took the recipe in a slightly different, more anise-flavored direction, but want to say thank you to Peter for providing the framework.

Gigantes with Tomato and Fennel

1 bag (~450 grams) dried large lima/butter beans*
2 medium carrots, chopped
2 celery stalks, diced
3 cloves garlic, smashed
3 bay leaves
1 1/2 large onions, diced
1 lb canned, skinless plum tomatoes, loosely chopped
1/2 large fennel bulb (or 1 smaller one), diced
1 large handful of parsely, finely chopped
2 tbsp tarragon, finely chopped
large pinch fennel seeds
1/2 tsp smoked paprika
large pinch of ground savory (optional)
2 tbsp pernod
salt and pepper
olive oil

Preheat oven to 380F early enough that it will be at the right temperature when you are ready to put the baking dish into the oven.

Cooking the Beans
I soaked the beans during the day in cold water, but you can skip this step and just cook them for longer. Place the beans in a large pot along with the carrots, celery, garlic and bay leaf, then cover with cold water. Bring to a boil and then reduce to a bubbling simmer (not a gentle simmer) and cook until tender. If you soaked the beans, this can be about 20 to 25 minutes, and if not, more like 45 to 50 minutes. Remove from the heat.

Making the Sauce (can be done in parallel with beans)
Heat up 3 tablespoons of olive oil in a large saute pan and cook the onions. When they start to turn translucent, add the tomatoes, fennel, fennel seed, paprika, parsely, tarragon and savory, and cook at a light simmer, stirring occasionally. Add about 1/2 tsp of salt and several pinches of black pepper. After about 10 minutes, stir in the pernod and continue to cook for another 20 minutes or so, adding more water if it starts to get too dry. Taste for salt and pepper. Because the beans will have no salt, it is fine to make the sauce a touch saltier than you might normally go.

With a slotted spoon, scoop out the beans, carrots and celery and place in a large baking dish (I had to use my biggest one). Pour the tomato sauce on top and gently mix in. Then pour in the cooking liquid from the butter beans until everything is just barely covered.

Place the baking tray in the oven and cook for an hour, or until much of liquid is gone and the top is browned. Note: I got hungry and pulled them after about 50 to 55 minutes before they really browned nicely, but they still tasted delicious.

gigantes baking dish

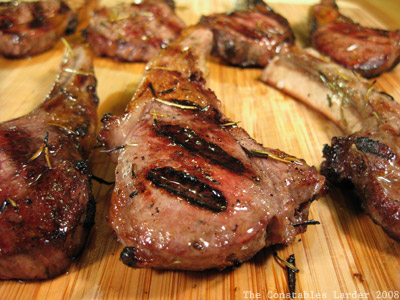
I don't know what the blogosphere Greeks will say about my fennel/pernod/tarragon direction compared to the classic, but I really enjoyed it and Lisl gave it an enthusiastic two thumbs up. In tonight's case, I went in a non-vegetarian direction by pairing it with some lamb chops marinated with rosemary and then grilled, and served it all with a nice red Zinfindel.

grilled lamb

* Note: while I gather from online reading that true gigantes are a different bean from the large butter/lima beans we find in our supermarkets, most recipes allow for the swapping of the two.

I thought I would submit this to My Legume Love Affair, which is a blog event I've been wanting to join for a while now. This month it is being hosted by When My Soup Came Alive.